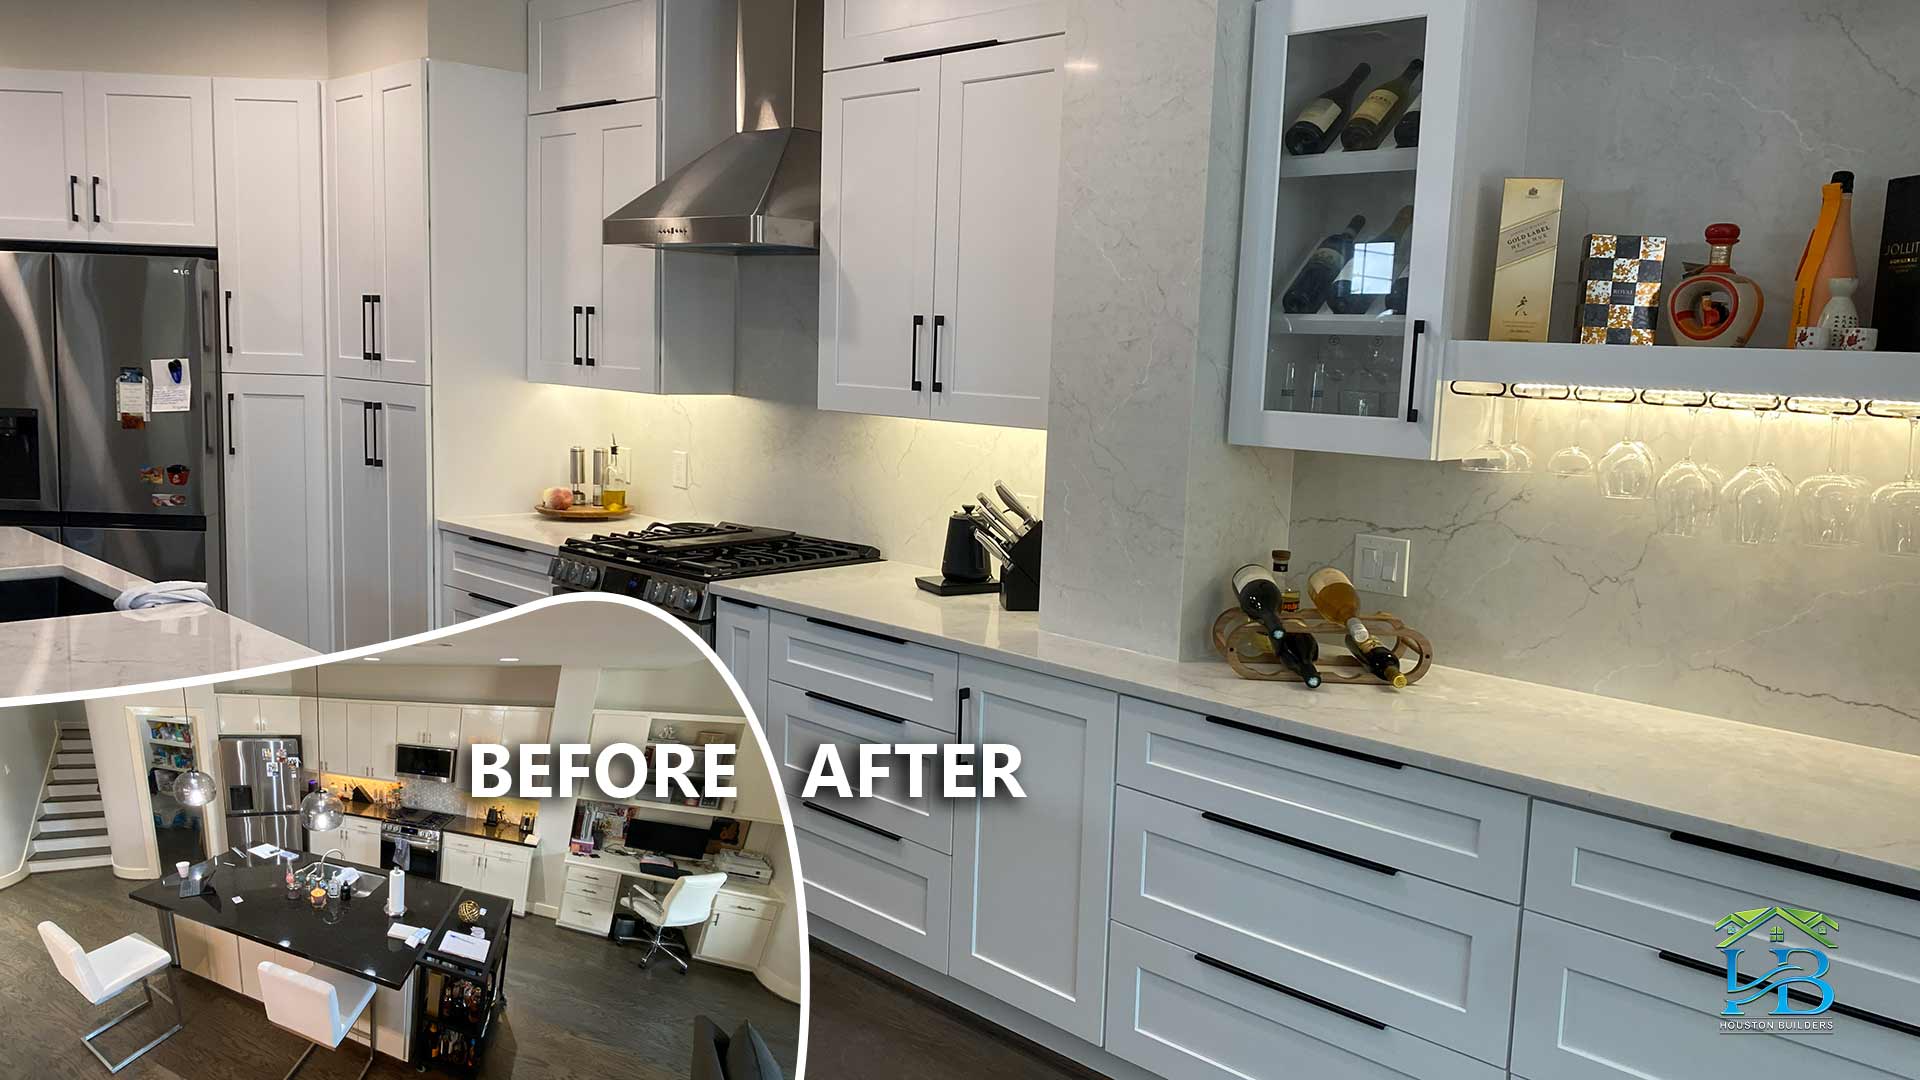
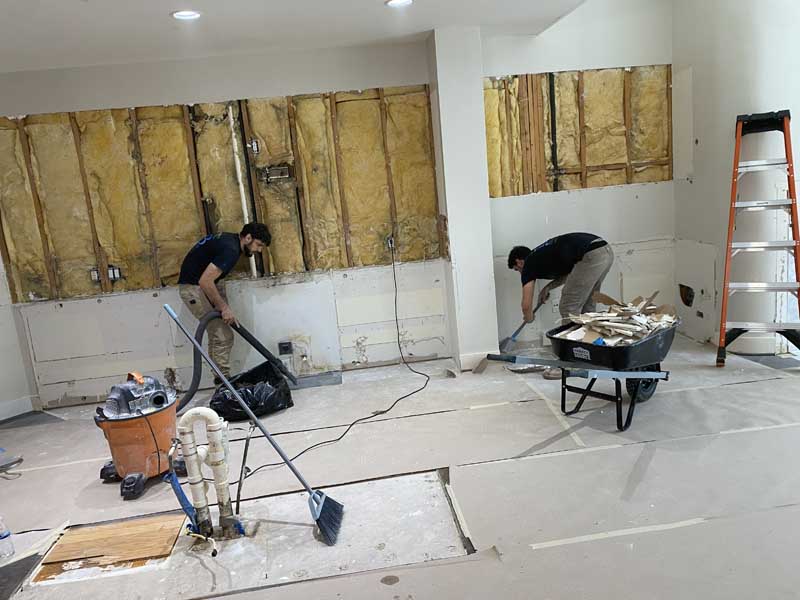
Before and process gallery

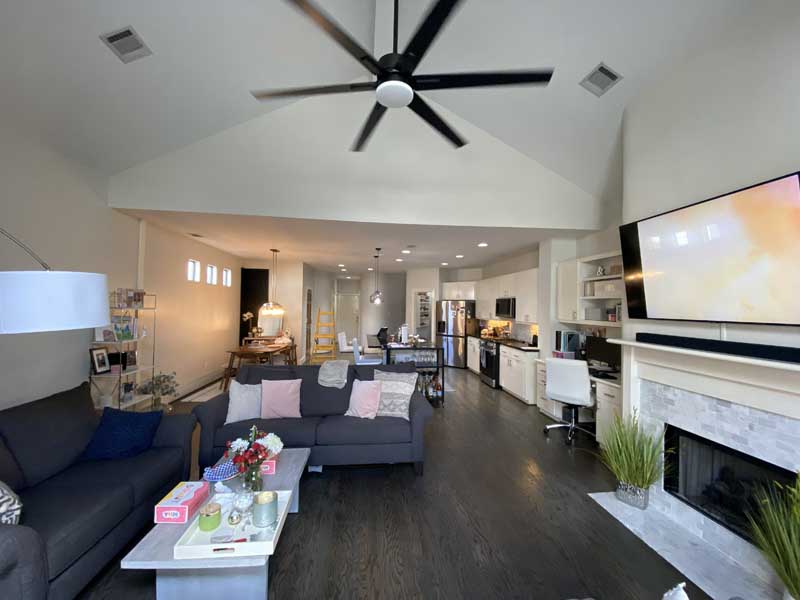
After gallery
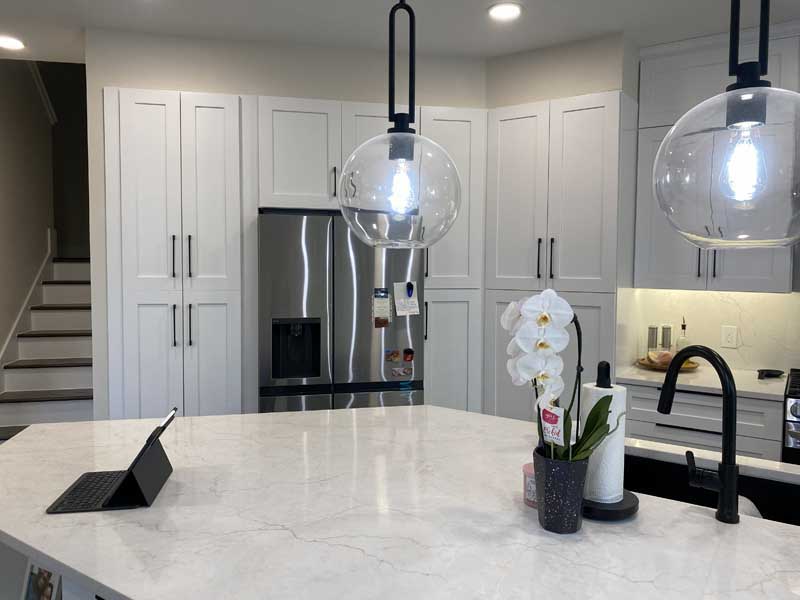
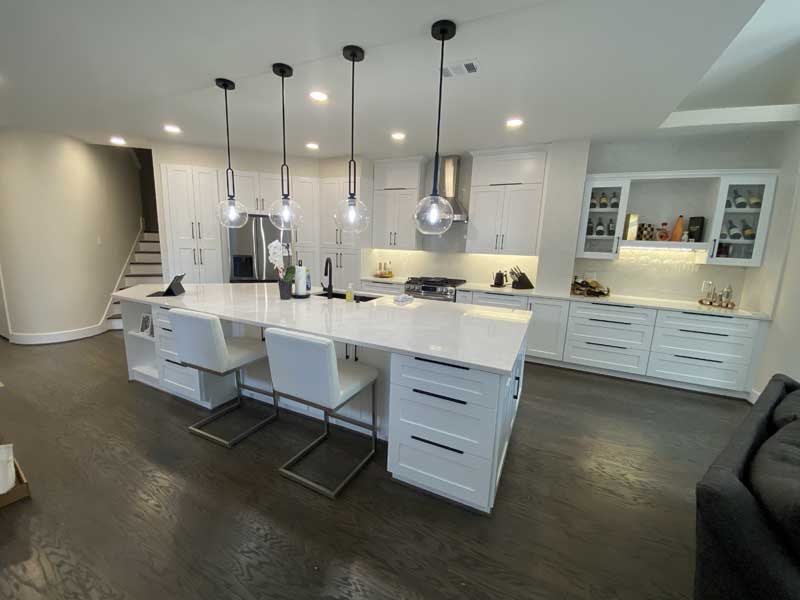
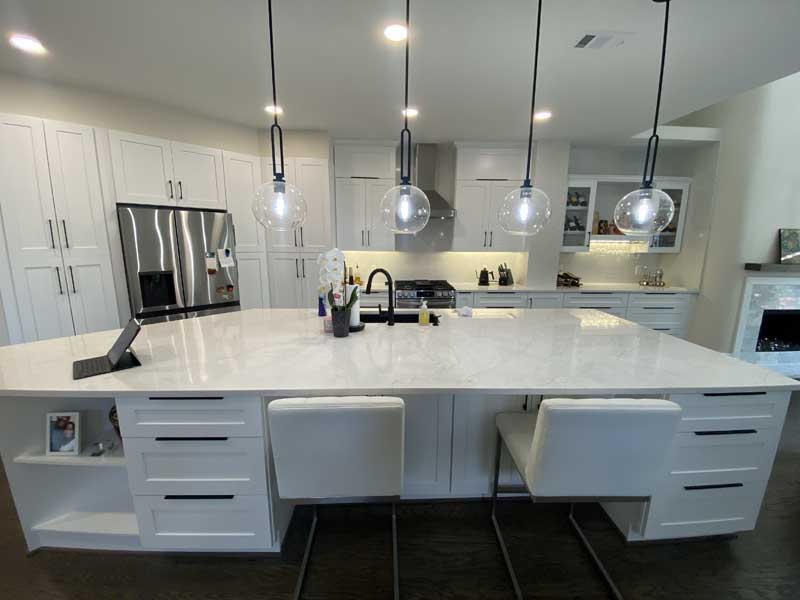
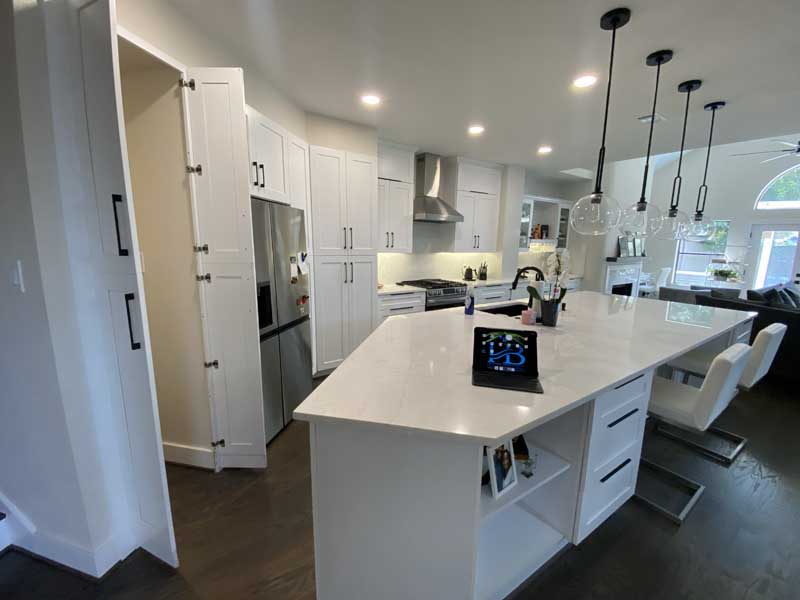
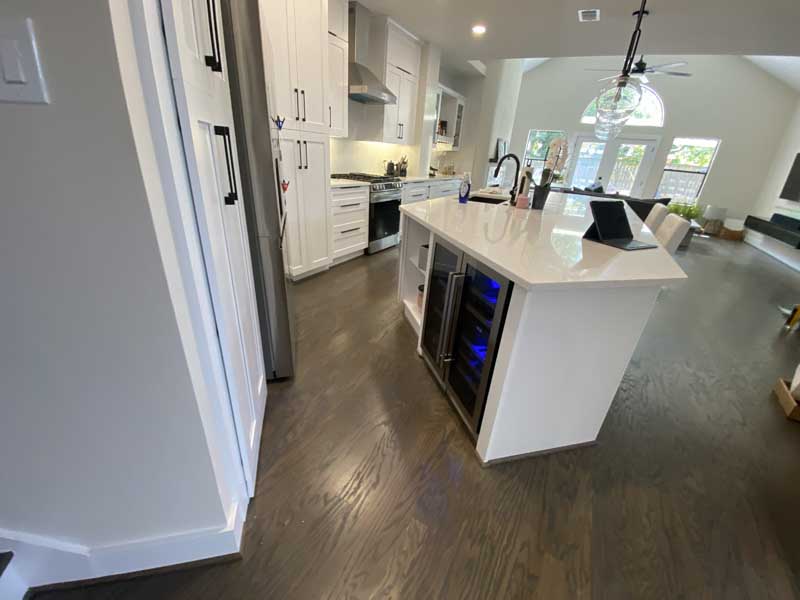

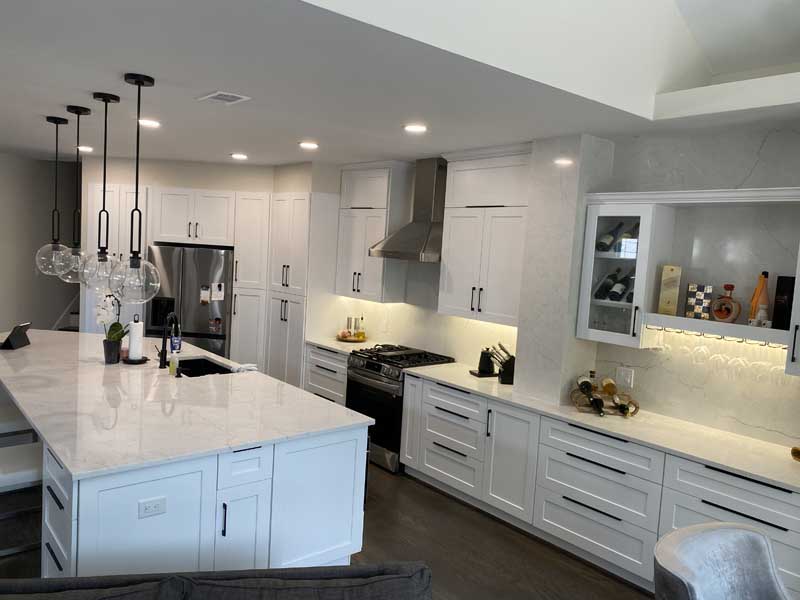
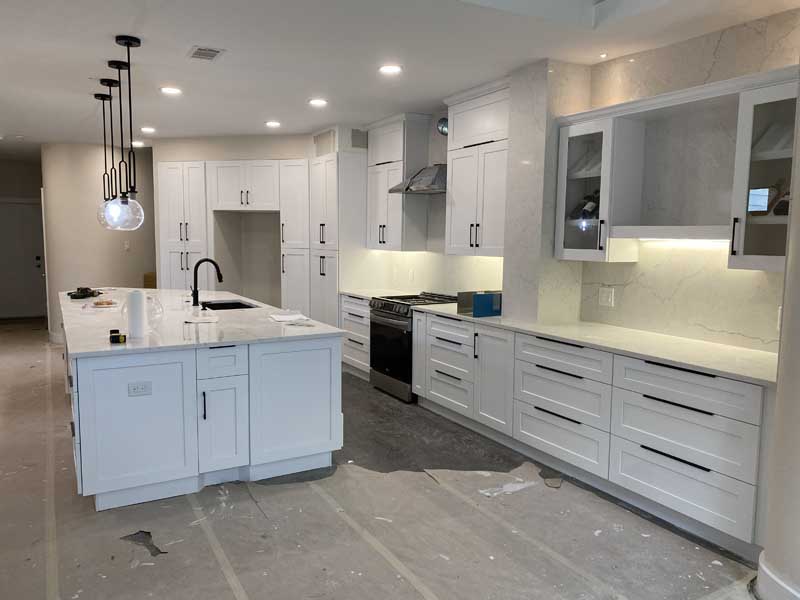
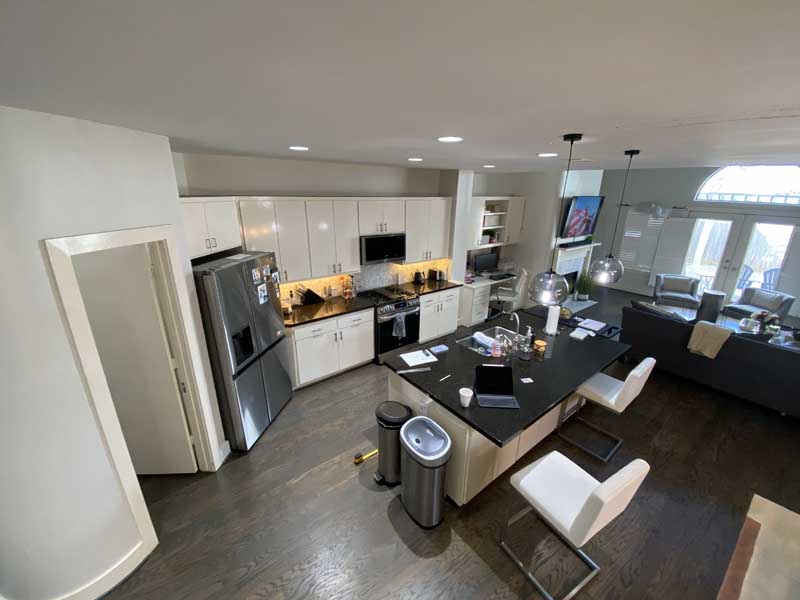
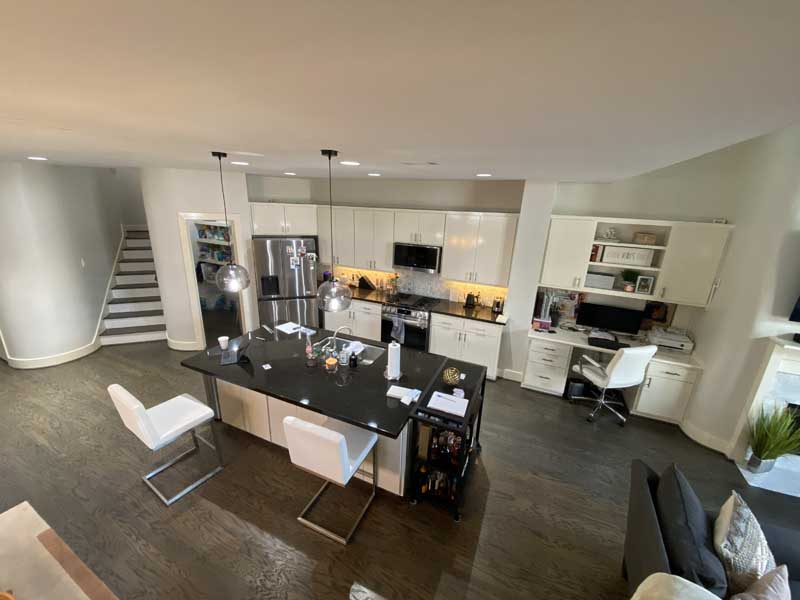
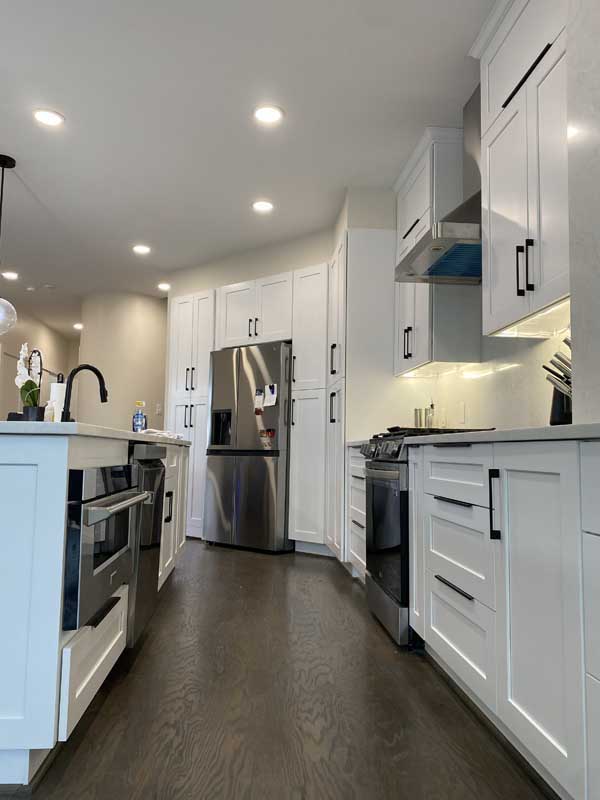
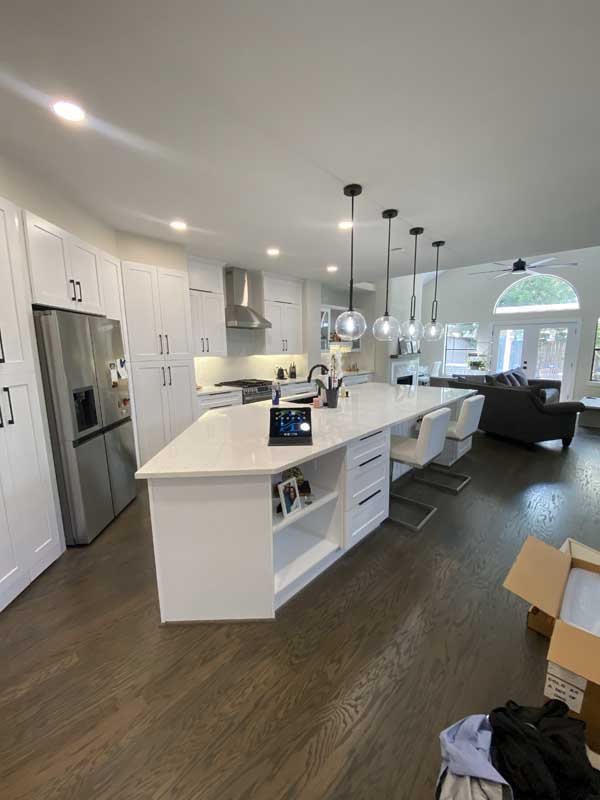
When you walk into this Houston home now, you’re greeted by 520 square feet of open-concept kitchen and living space that feels twice as large as the footprint suggests. White shaker cabinets reach the ceiling, a waterfall-edge marble island seats four comfortably, and glass globe pendants cast warm light across Calacatta countertops. Eleven weeks ago, this was a choppy, dated space with builder-grade finishes and a layout that did not reflect how people actually live.
The homeowners wanted what most Houston families wish to: a kitchen that opens to the living area where they actually spend time, enough counter space to cook without playing Tetris with appliances, and storage that doesn’t require climbing on counters to reach the top shelf. We delivered that in 11 weeks. Industry standard for a project this size? Twenty to twenty-four weeks, and that’s if everything goes smoothly.
This wasn’t just cosmetic updates. We’re discussing a complete kitchen remodel with structural modifications, upgraded electrical service, new plumbing runs, and HVAC modifications to support the open floor plan. Every decision required balancing the homeowners’ vision against Harris County building codes, budget realities, and the physics of making a 1990s home function like new construction.
![]()
Open Concept Design: Removing Walls the Right Way
The original layout had the kitchen walled off from the living room with a load-bearing wall running perpendicular to the ceiling joists. You couldn’t just knock it down. That wall was holding up the second floor. We engaged a structural engineer to design a flush-beam system using doubled 2×12 LVL beams to carry the Load while creating an unobstructed 14-foot opening.
Harris County requires stamped structural drawings for any load-bearing wall removal. No exceptions. We submitted the engineering plans along with our permit application, which added $1,850 to the project cost but saved the homeowners from potential disaster. I’ve seen DIY attempts and work by unlicensed contractors where they just “sister up some boards” and hope for the best. That works until the ceiling starts sagging or worse… something fails catastrophically.
The beam installation took two days. We shored up the ceiling with temporary supports, cut out the existing wall, set the new LVL beam assembly, and transferred the Load. The final opening measures 14 feet wide by 8 feet tall, precisely what the space needed to feel open without creating a structural nightmare.
We completed a similar wall-removal project 1.4 miles from Memorial Park, where the previous contractor installed an undersized beam. Three years later, the homeowners noticed cracks in the ceiling, drywall, and doors that wouldn’t close properly. The structural engineer we brought in found deflection exceeding code limits by 300%. Reworking cost them $28,000, five times what proper engineering would’ve cost upfront.
“Load-bearing wall removal in Houston requires understanding not just current loads but future loads. What happens when the homeowners add solar panels to the roof? What about that second-story addition they’re thinking about in five years? We engineer for the building’s entire lifecycle, not just today’s configuration. I’ve got homeowners who saved $2,000 skipping the structural engineer, then spent $35,000 fixing the problems two years later. Harris County inspectors know what to look for, if your beam isn’t properly sized and supported, you’re not getting your certificate of occupancy. And good luck selling a house without that documentation.”
![]()
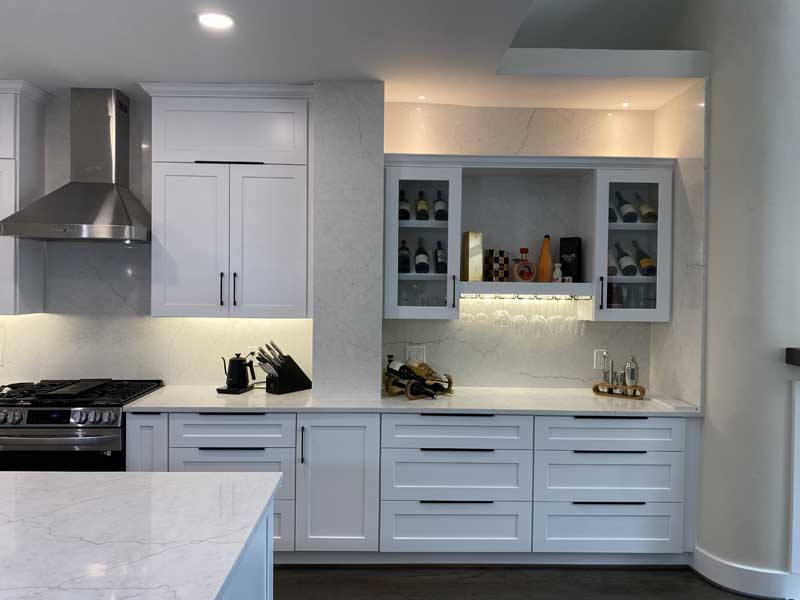
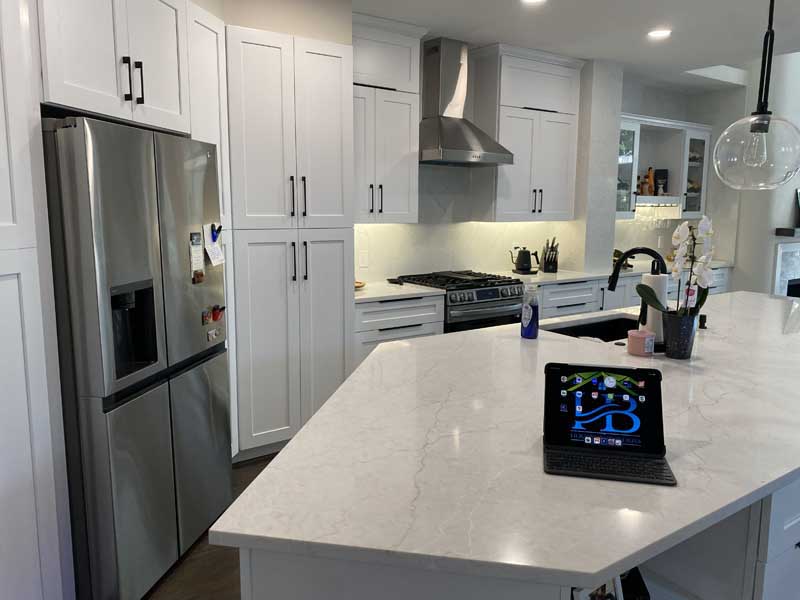
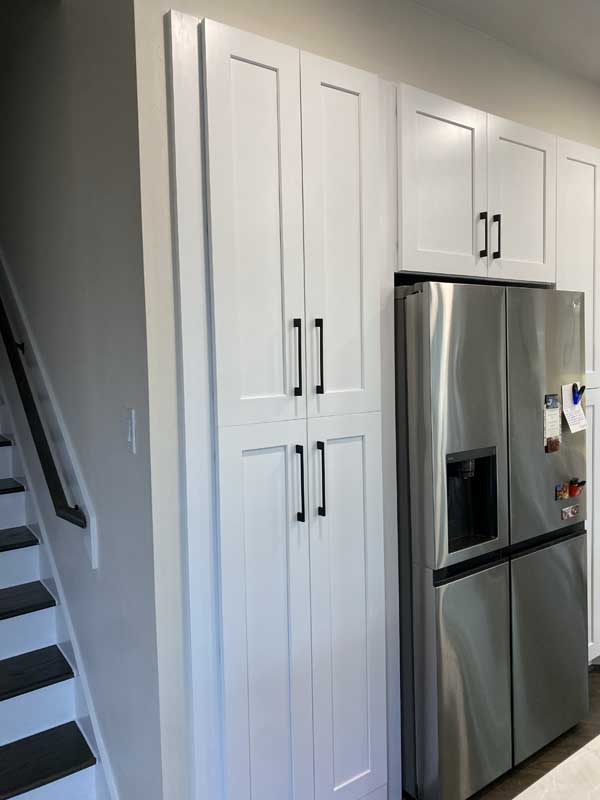
Custom Cabinetry: Why We Don’t Use Big-Box Options
The homeowners initially priced cabinets at Home Depot and Lowe’s. They received quotes of around $18,000 for particleboard boxes with veneer fronts, soft-close hardware that stops working after 2 years, and a 1-year warranty. We connected them with our cabinet partner, a local shop that builds plywood boxes with dovetail joinery, mortise-and-tenon face frames, and full-extension drawer slides rated for 100 pounds.
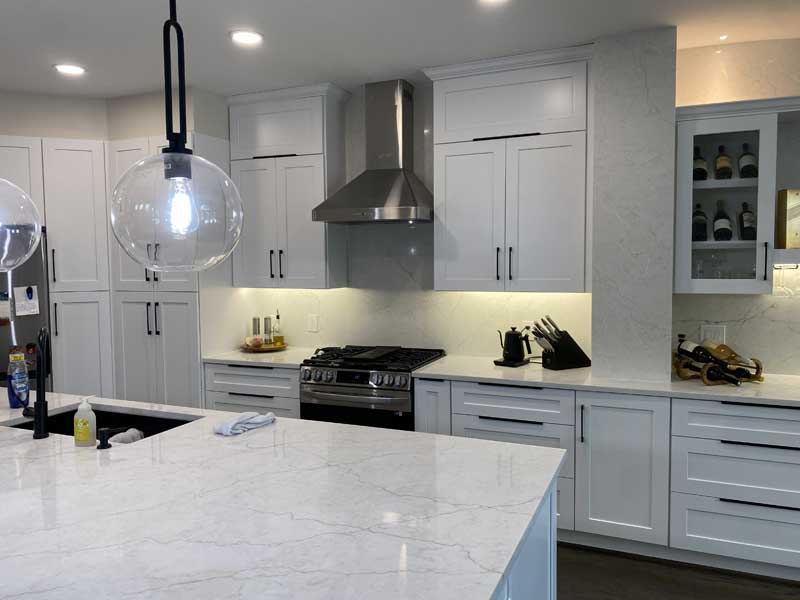
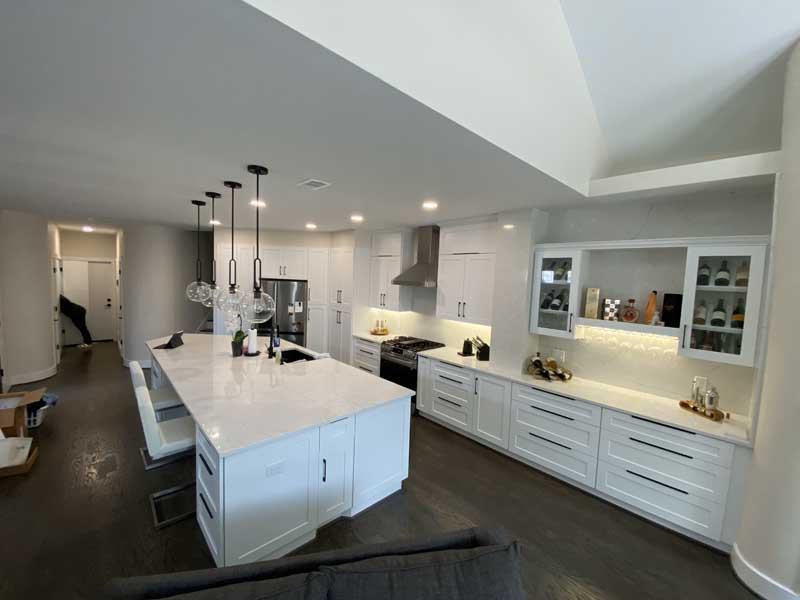
Final cabinet cost: $24,500. That’s 36% more than big-box pricing, but here’s what they got: solid maple face frames, 3/4-inch plywood boxes (not particleboard), Blum hardware with a lifetime warranty, and custom sizing that maximized every inch of available space. The upper cabinets go to the ceiling, no wasted space, no dust-collecting gap, just clean lines and 40% more storage than standard 30-inch uppers.
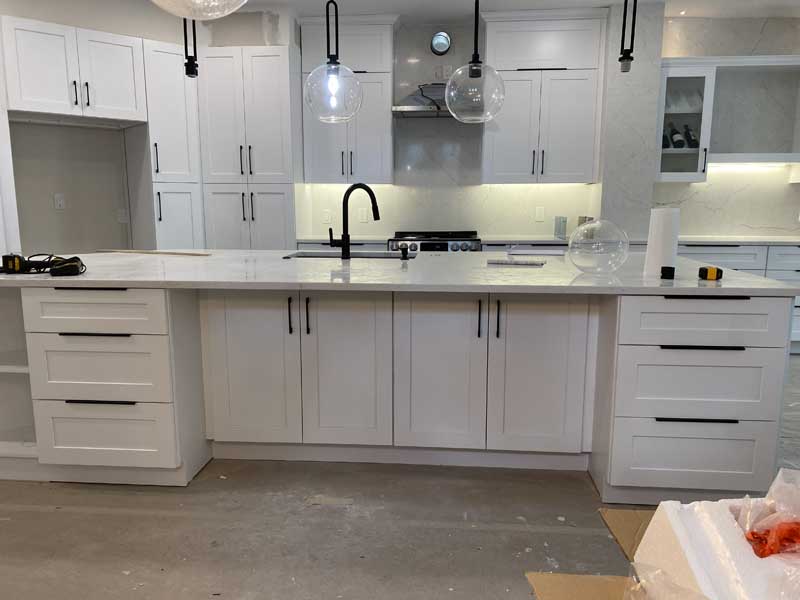
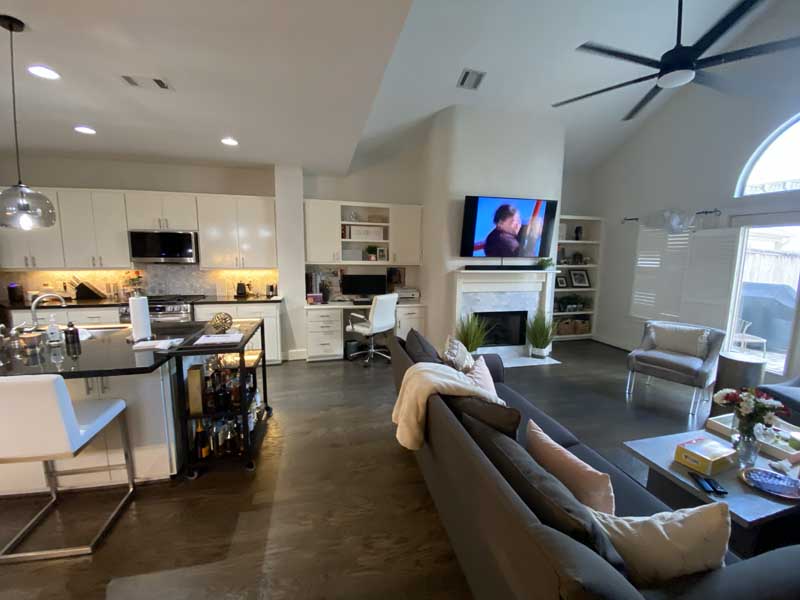
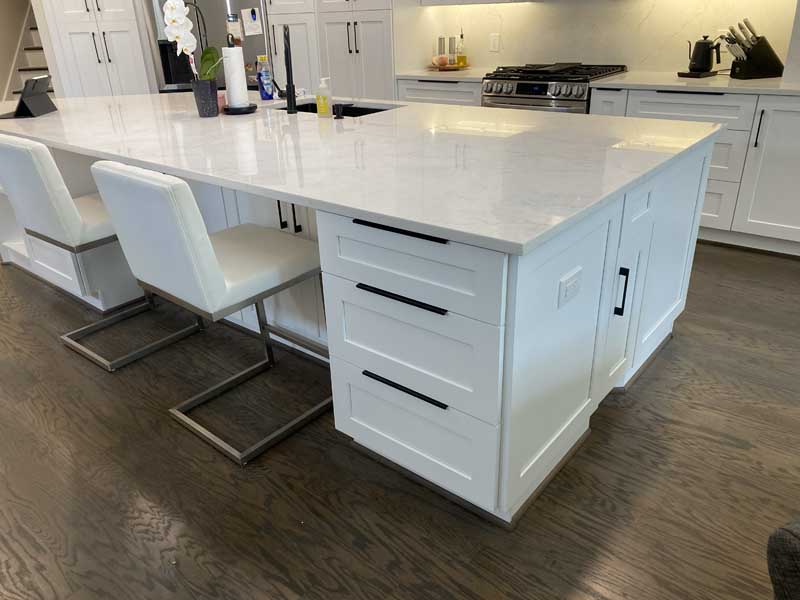
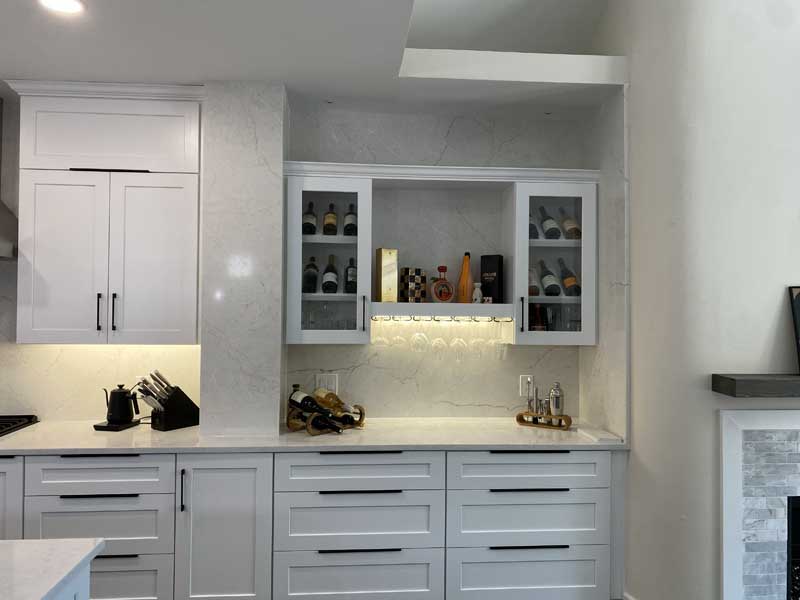
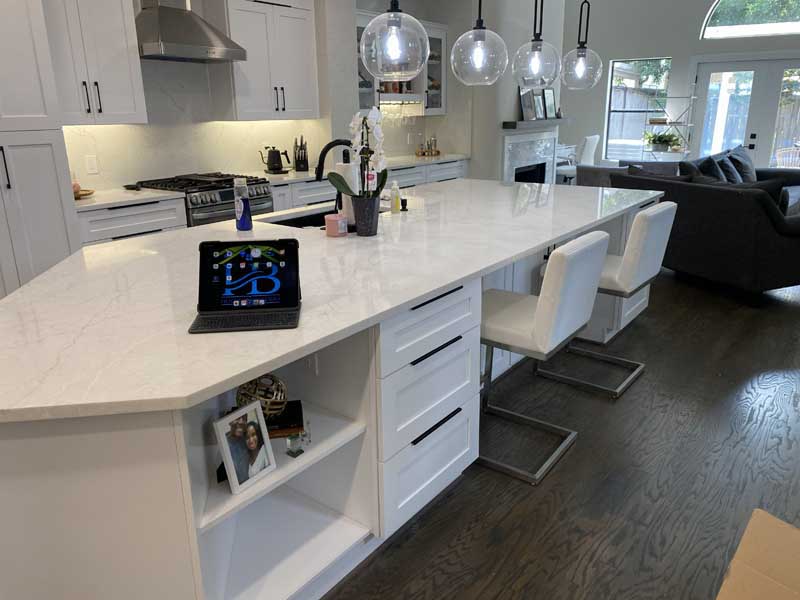
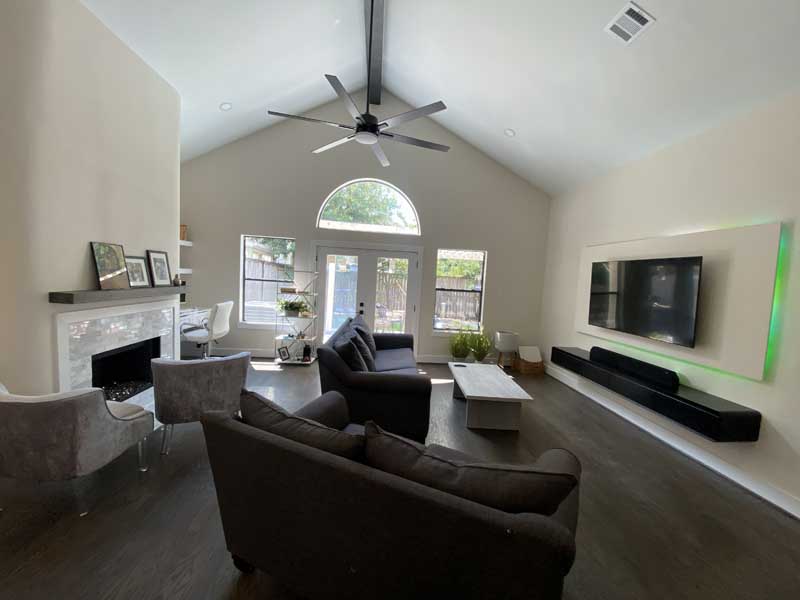
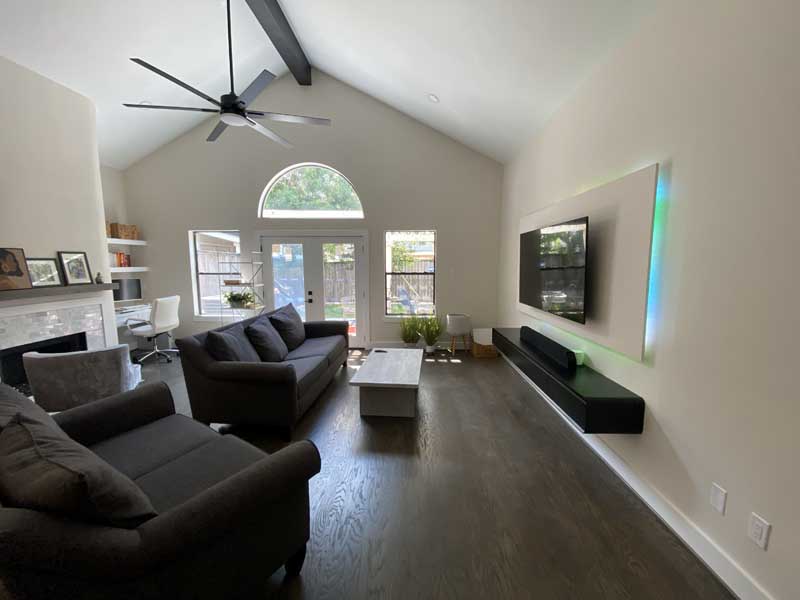
Another After Gallery
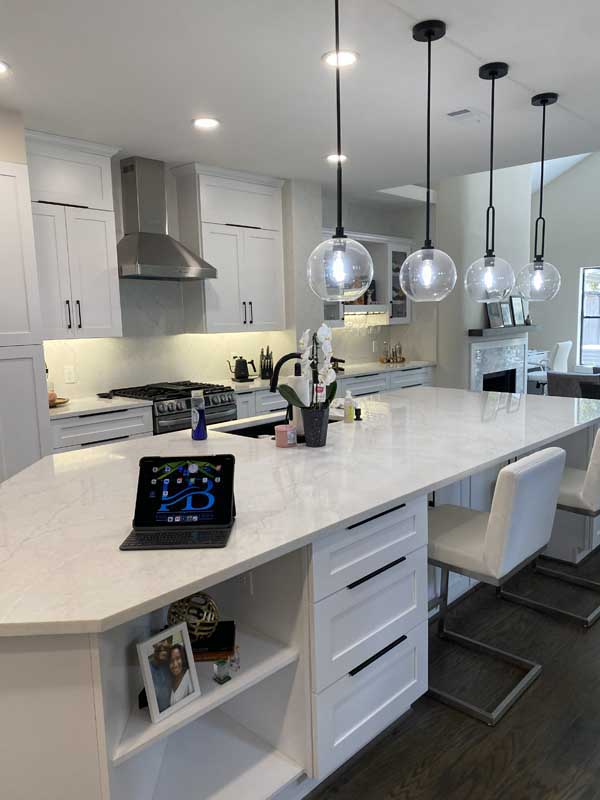
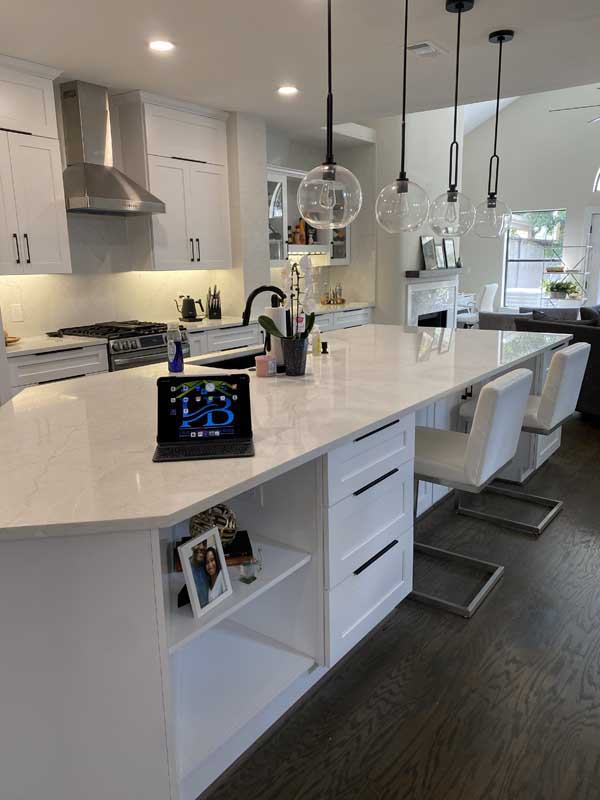


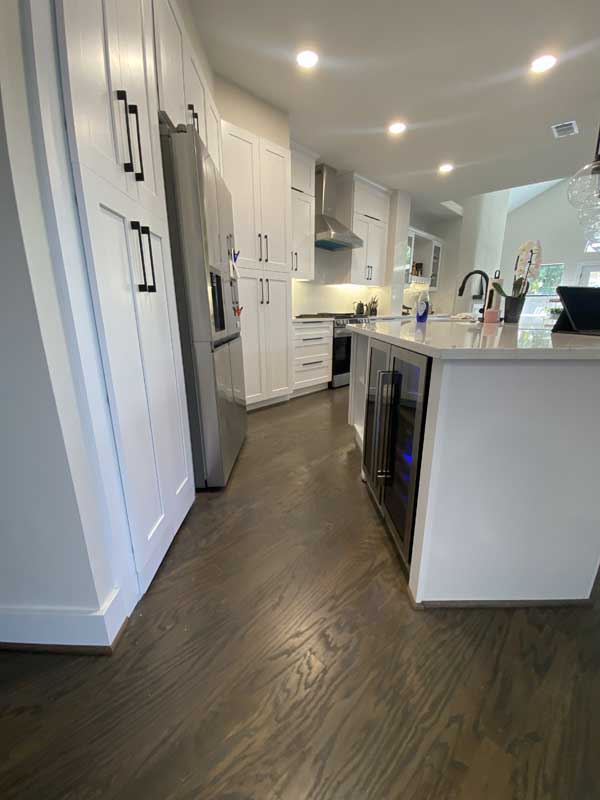

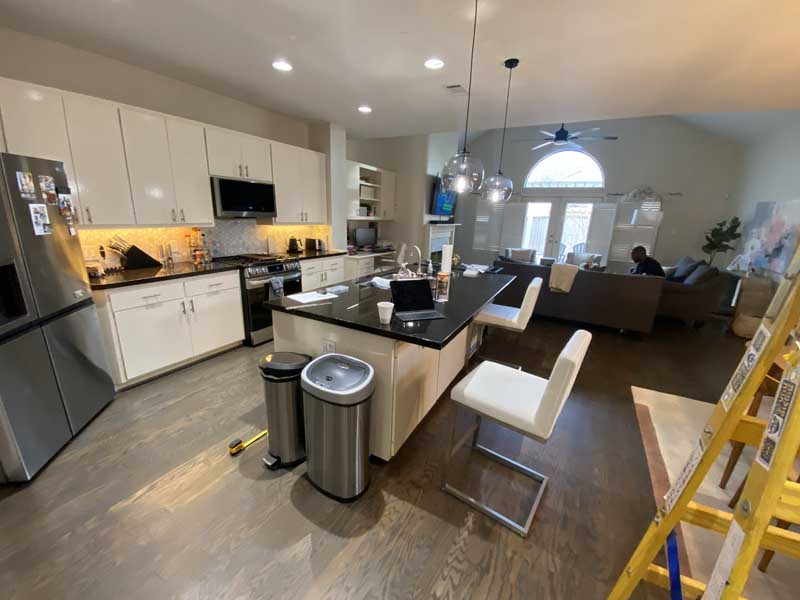
The island measures 10 feet long by 4 feet deep with seating for four on one side and a bank of drawers on the working side. We specified 21-inch-deep base cabinets instead of standard 24-inch cabinets to maintain a comfortable walkway width (42 inches) on both sides. The National Kitchen and Bath Association recommends 42-48 inches for kitchen aisles; anything less creates traffic bottlenecks when multiple people are working.
| Cabinet Component | Big-Box Standard | Custom Shop Quality | Lifespan Difference |
|---|---|---|---|
| Box construction | 5/8″ particle board, cam-lock assembly | 3/4″ plywood, dado joints with glue and screws | 2x longer (15-20 years vs. 30-40 years) |
| Face frames | Veneer over MDF, stapled construction | Solid maple, mortise-and-tenon joinery | Permanent vs. 8-12 years before separation |
| Drawer slides | Epoxy-coated steel, 75 lb capacity | Blum Tandem Plus, 100 lb capacity, soft-close | Lifetime warranty vs. 2-3 years |
| Door hinges | Standard European hinge, 15-20 year life | Blum Clip-Top Blumotion, lifetime warranty | Never need replacement vs. eventual sag |
| Finish | Catalyzed vinyl, prone to yellowing | Conversion varnish, UV-stable | Color-stable vs. yellowing in 5-7 years |
| Warranty | 1-year limited | Lifetime on boxes/frames, 10 years on finish | Protected investment vs. replacement costs |
Installation took three days. The cabinets arrived pre-finished and ready to hang. We started with the wall cabinets, using a laser level to mark a perfectly level reference line around the entire room. Every cabinet hangs from that line, no shims, no adjustments, just professional-grade installation that’ll still be level in 20 years.
![]()
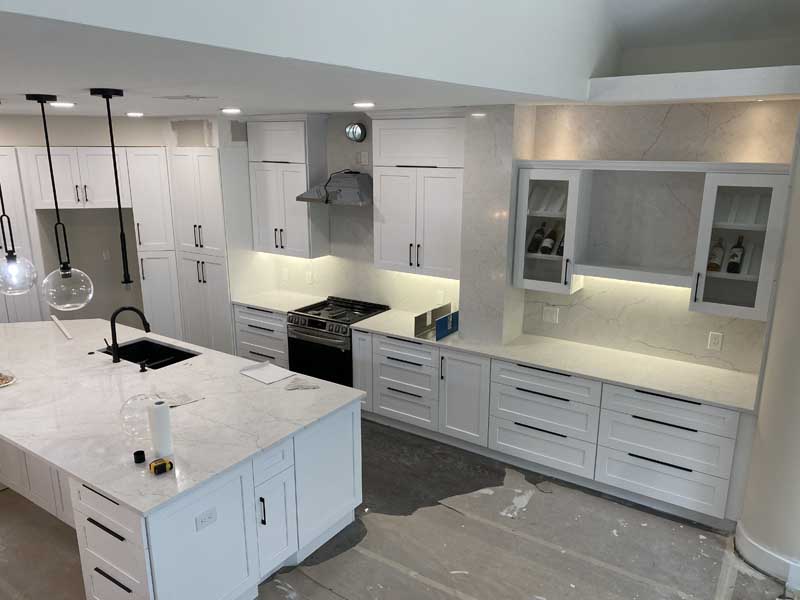
Countertops and Backsplash: Material Selection That Matters
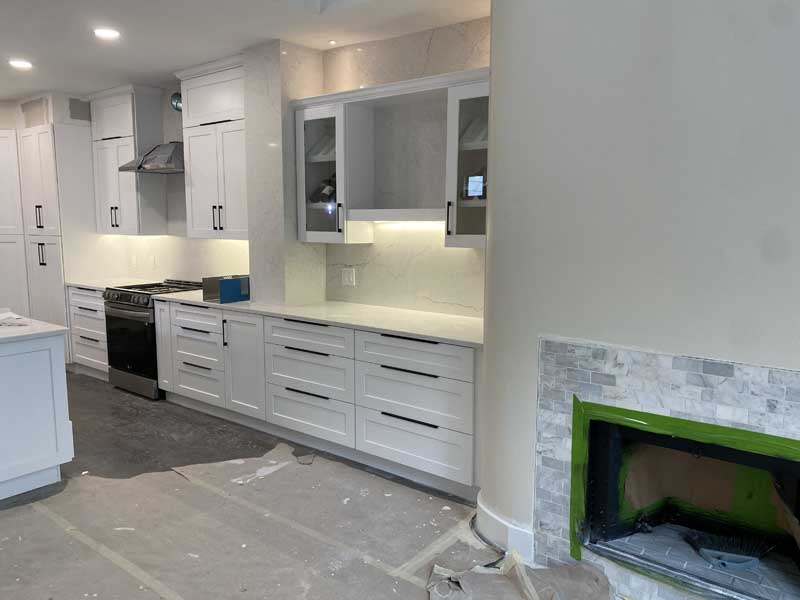
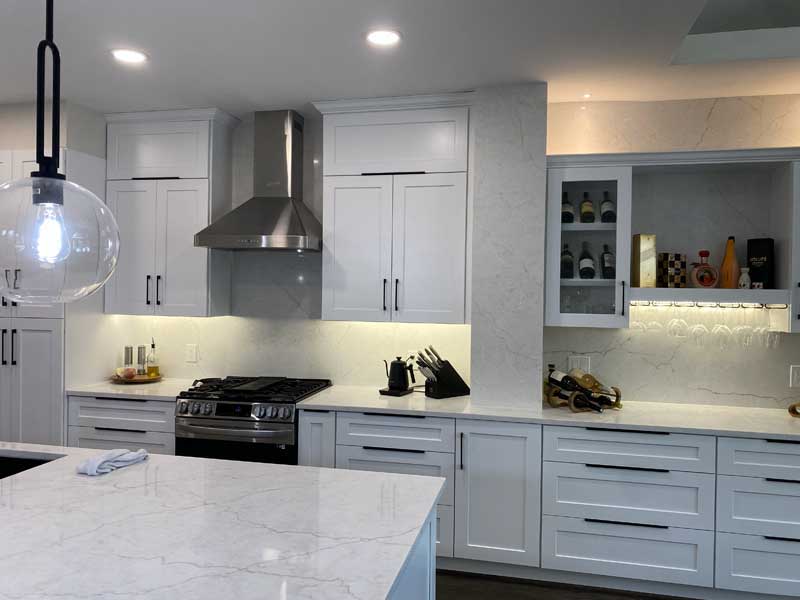
The island was finished in Calacatta marble, a nontraditional choice for a working kitchen, but the homeowners wanted the look and understood the maintenance requirements. We sealed it with a penetrating sealer rated for marble (not granite, different porosity requires different products). We provided a care kit with a pH-neutral cleaner and instructions for annual resealing.
The perimeter countertops use Caesarstone Calacatta Nuvo engineered quartz in a Calacatta pattern that mimics marble without the maintenance headaches. 3cm thick with a polished finish. Quartz doesn’t require sealing, resists staining better than natural stone, and maintains its appearance without the constant maintenance required by marble.
Why mix materials? Budget and practicality. Marble on the island, where it’s visible and impressive, quartz everywhere else, where people actually work, near the sink, by the cooktop, in the prep areas. This approach saved 4,20 compared tos all-marble while delivering the aesthetic they wanted, where it counts.
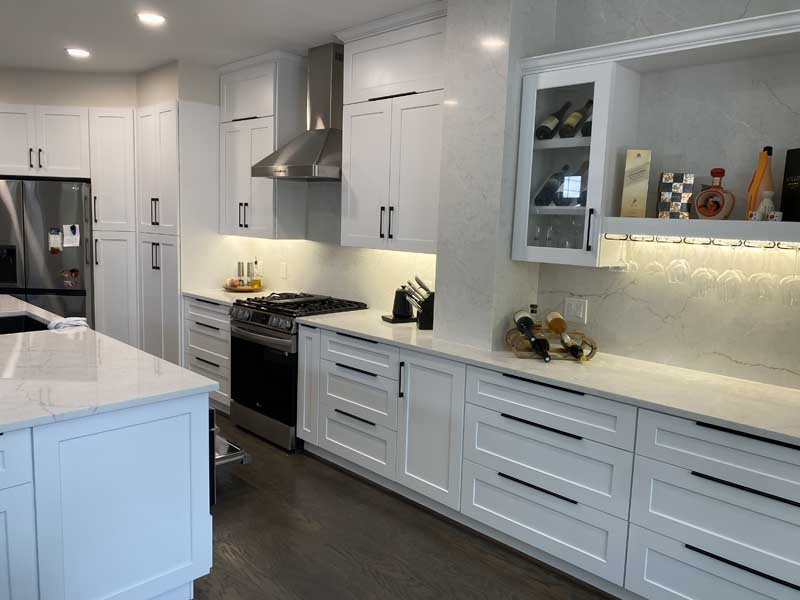
The backsplash uses 3×12-inch white subway tile with a slight beveled edge, set in a running bond pattern with 1/16-inch grout lines. Simple, classic, and it’ll look good in 20 years when whatever’s trendy today seems dated. We used Laticrete PermaColor Select grout in Bright White with epoxy modification, stain-proof, easy to clean, and it won’t darken over time like standard cement grout.
| Countertop Material Cost | stalCostCost (perCostft) | Maintenance Level | Best Applications |
|---|---|---|---|
| Calacatta Marble (natural stone) | $135-$215 | High – annual sealing, pH-neutral cleaners only, etches from acids | Islands, low-traffic areas, and visual statement pieces |
| Engineered Quartz (Caesarstone, Cambria) | $95-$165 | Low – no sealing needed, stain-resistant, heat-resistant to 300°F | Perimeter counters, prep areas, near sinks and cooktops |
| Granite (natural stone) | $75-$145 | Medium – seal every 1-2 years, generally durable, some varieties stain | All-purpose, budget-conscious projects, heat resistance needed |
| Quartzite (natural stone) | $115-$195 | Medium – seal annually, harder than granite, can etch from acids | High-end installs, areas needing a marble look with better durability |
| Porcelain slabs (sintered stone) | $105-$175 | Very low – heat proof, scratch resistant, UV stable, zero maintenance | Outdoor kitchens, high-heat areas, and zero-maintenance requirements |
| Solid surface (Corian, etc.) | $65-$95 | Low – no sealing, scratches can be sanded out, heat sensitive | Budget projects, integrated sinks, and areas without hot pans |
We templated the countertops digitally using a Proliner measuring system, achieving accuracy of 1/16 inch across the entire kitchen. Traditional cardboard templates can be off by 1/4 inch or more, resulting in gaps at the backsplash or overlapping seams. Digital templating eliminated those problems.
![]()
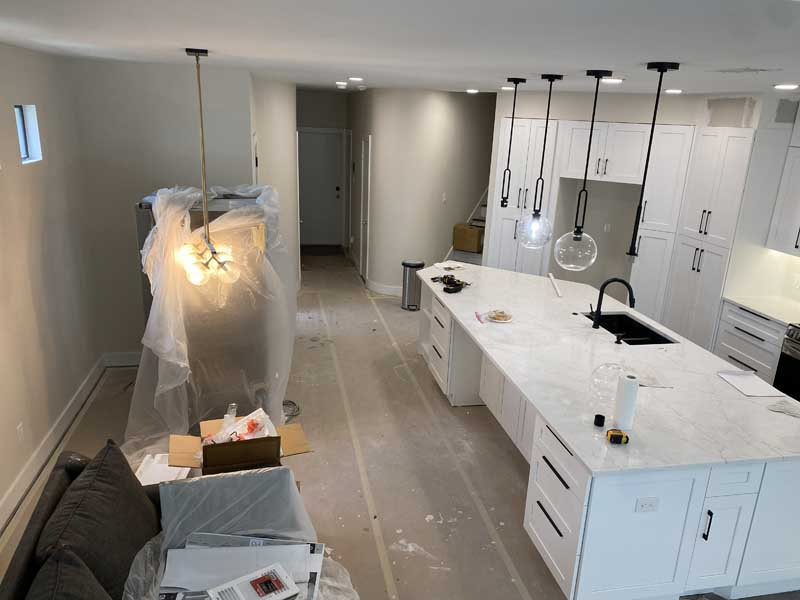
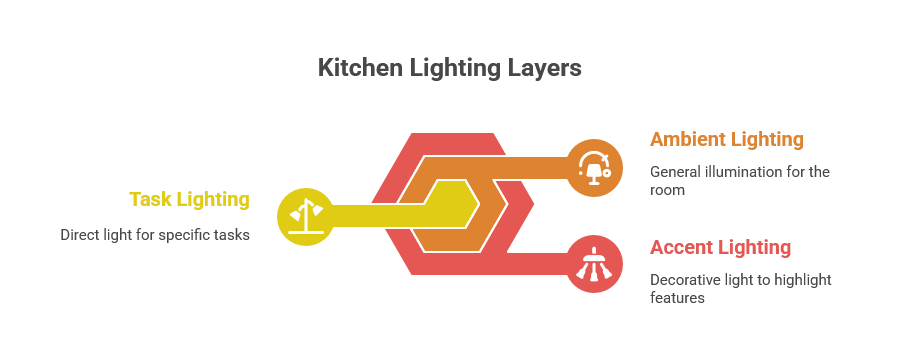
Lighting Design: Three Layers That Transform the Space
Lighting makes or breaks kitchen functionality. We designed three distinct layers: ambient (general illumination), task (work surface lighting), and accent (decorative and mood). Most contractor-grade kitchen remodels slap in recessed cans and call it done. That creates shadows where you’re working and doesn’t support how people actually use the space at different times of day.
Ambient lighting is provided by eight 4-inch recessed LED cans with dimmer controls, arranged in two rows of four, to deliver even illumination without creating shadows. We used a 3000K color temperature (warm white) instead of the harsh 5000K used in hospital operating rooms, light output: 900 lumens per can, totaling 7,200 lumens for the combined kitchen and living area.
Task lighting under the wall cabinets uses continuous LED strip lighting with diffusers that eliminate the spotty effect you get from puck lights. This provides shadow-free illumination directly on the counter work surfaces. We ran these on a separate switch and dimmer so homeowners can use them independently of the overhead lighting.
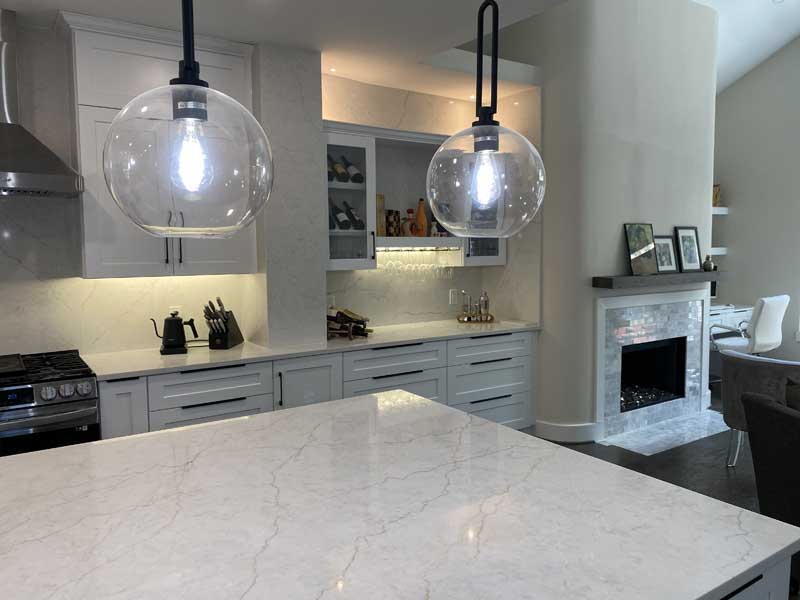
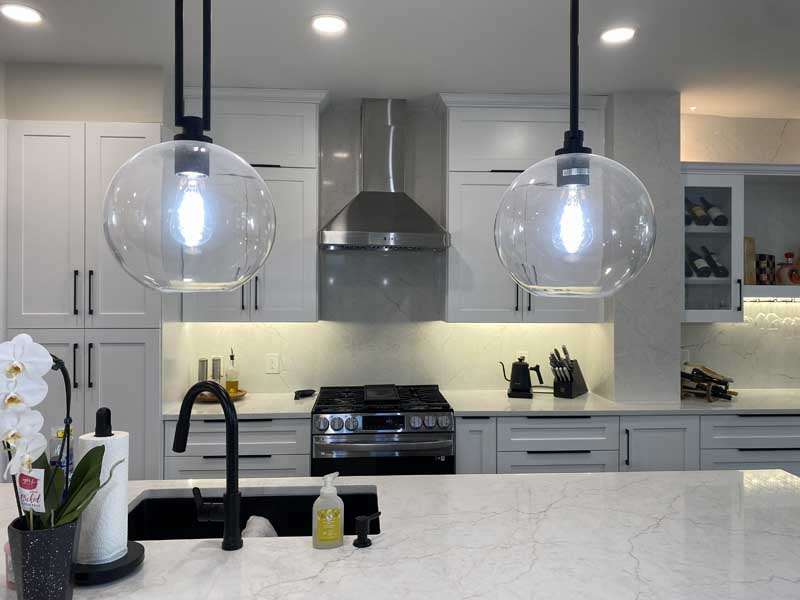
Accent lighting is where personality shows. We installed four glass-globe pendants over the island, each with an 8-inch clear glass globe, matte-black hardware, and exposed-filament LED bulbs. These provide targeted light for the seating area while creating visual interest. Height matters: we hung them 32 inches above the counter, giving unobstructed sightlines while preventing glare when seated.
Total lighting budget: $3,850, including fixtures, installation, electrical work, and dimmer controls. Compare that to the $800 “contractor special” package (6 recessed cans and nothing else) that leaves homeowners disappointed with their expensive remodel.
“I’ve watched homeowners spend $75,000 on a kitchen remodel and then cheap out on lighting with $800 worth of basic recessed cans. They’re disappointed from day one because the space doesn’t feel right, but they can’t articulate why. Lighting is the difference between a kitchen that photographs beautifully and one you actually want to spend time in. Under-cabinet lighting alone changes how usable the space is, you’re not working in your own shadow when you’re chopping vegetables. And dimmer controls are non-negotiable. You want bright light when cooking dinner and low ambient light when entertaining. The extra $2,000 for proper lighting design returns value every single day for 20 years.”
![]()
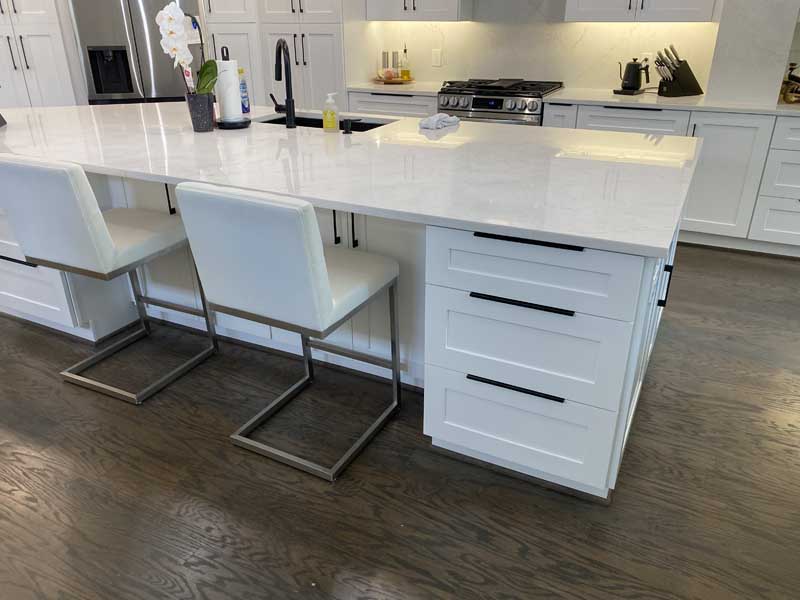
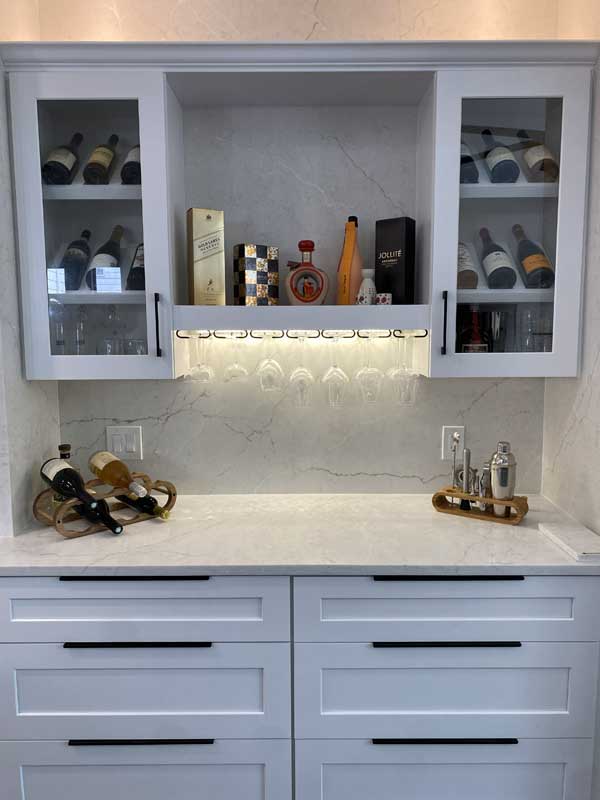
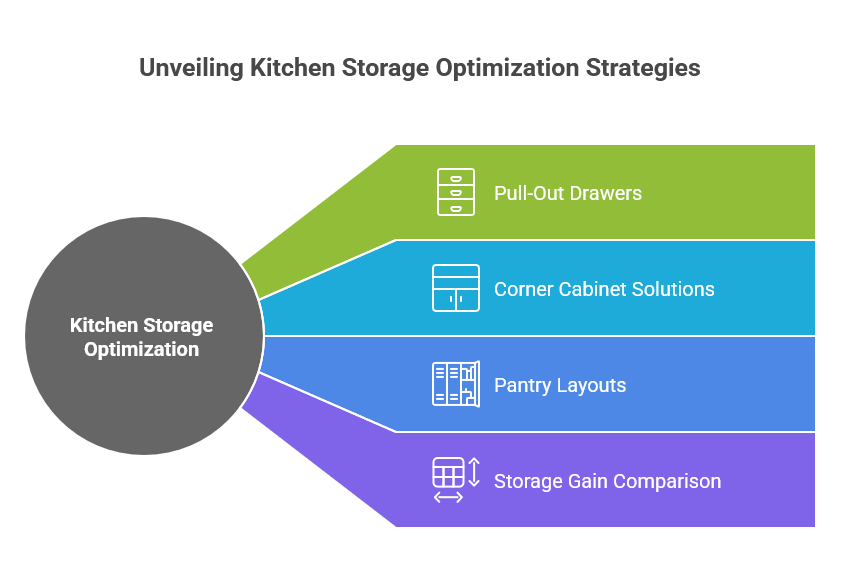
Storage Solutions That Actually Work
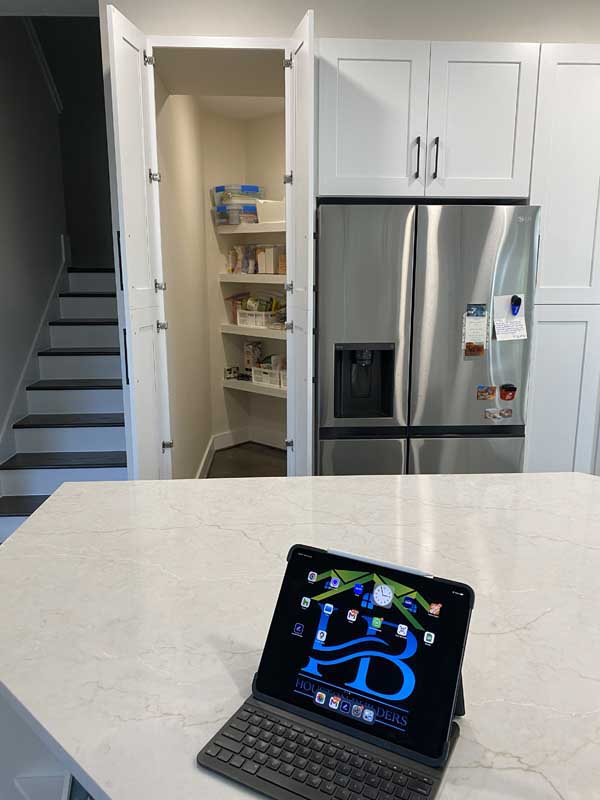
This kitchen has 82 linear feet of cabinets, but it’s not the quantity; it’s how we configured the interior space. Pull-out shelves in base cabinet,s instead of fixed shelves,s increase usable storage by 40% because you can reach items in the back. Deep drawers for pots and pans with divider systems that keep lids organized. A full-height pantry with roll-out shelves on full-extension slides.
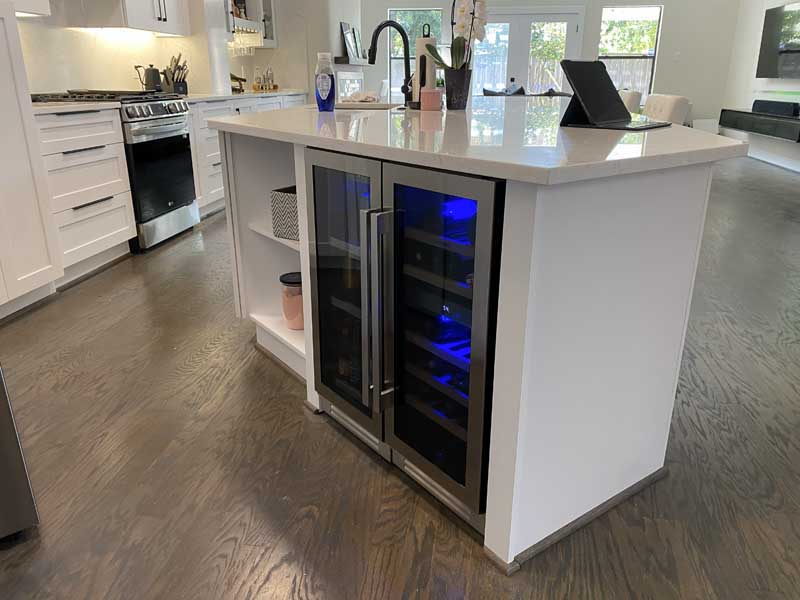
The island includes a built-in wine cooler on the living room side, with 30-bottle capacity, dual-zone temperature control, and LED interior lighting. This replaced the undercounter refrigerator the homeowners initially wanted, which would’ve cost more and provided less functional value. Wine coolers make sense in Houston’s entertaining culture; extra refrigerator space doesn’t when you’ve got a full-size fridge eight feet away.
Corner cabinet solution: We used a blind-corner organizer instead of the lazy Susan that the homeowners originally requested. The blind-corner system pulls out and swings, providing access to the entire cabinet interior. Lazy Susans waste about 35% of corner cabinet space, and items behind the carousel are hard to reach.
| Storage Feature | Cost Addition | Capacity Increase | Functionality Benefit |
|---|---|---|---|
| Pull-out shelves (vs. fixed shelves) | $135-$185 per cabinet | 35-40% more accessible space | Eliminate items lost in the back, and achieve complete visibility |
| Deep drawers with dividers | $215-$295 per drawer | 60% better organization | Vertical storage for pots/pans, no stacking |
| Blind-corner organizer | $425-$575 per corner | 70% vs. 45% usable space (vs. lazy Susan) | Nothing falls behind, full cabinet access |
| Pantry roll-out shelves | $850-$1,150 for a full pantry | Complete visibility of all items | Eliminates forgotten expired items, FIFO rotation |
| Under-cabinet LED lighting | $650-$950 for a complete kitchen | N/A – functional improvement | Shadow-free work surface, task visibility |
| Soft-close hardware upgrade | $1,200-$1,650 for a complete kitchen | N/A – durability/noise | Extends cabinet life, prevents slamming damage |
The spice pull-out next to the range is 6 inches wide and holds 42 spice jars in three tiers. ToCost: $ 18. Cost value to the daily cooking workflow: immeasurable. These are the details that separate professionally designed kitchen remodeling projects from contractor-grade work.
![]()
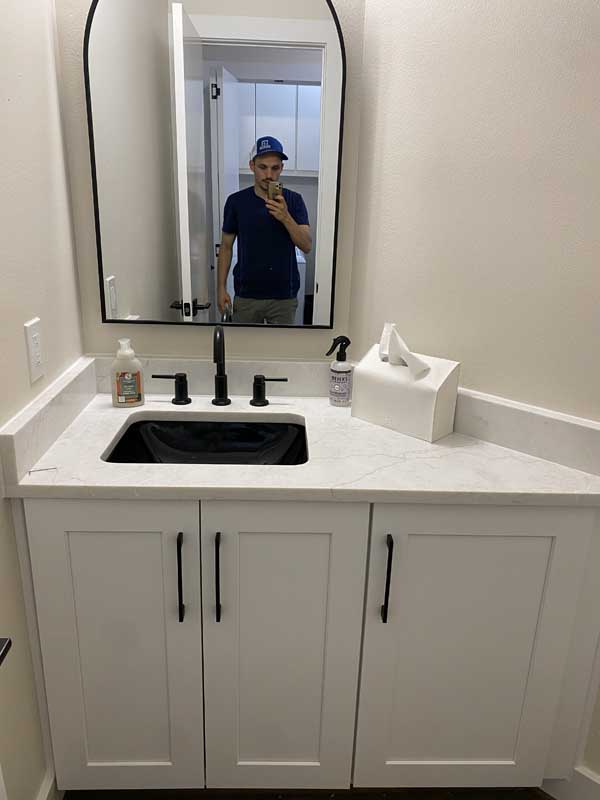
Plumbing Fixtures: Where Quality Shows Daily
The sink is an undermount stainless steel model, a Kraus 32-inch single-bowl, 16-gauge steel, with sound-deadening pads underneath. Single bowl versus double? For serious cooking, single wins. You can fit large sheet pans and roasting pans without gymnastics. The double-bowl design made sense when people hand-washed everything; with modern dishwashers, it’s less relevant.
Faucet selection: Kohler Artifacts pull-down with a professional-style spring spout. This isn’t decorative, it’s functional. The magnetic docking keeps the spray head secure, the pull-down hose extends 20 inches for filling stock pots, and the dual-function spray head switches between stream and spray with a button press. Cost: $625 installed. Will it last 20 years without leaking? Yes. Will the $140 builder-grade faucet? No chance.
We added a separate filtered water tap, a Brondell Circle reverse osmosis system with a dedicated brushed gold faucet to match the hardware. This eliminated the homeowners’ reliance on bottled water and pays for itself in 18 months, compared with purchasing filtered water. Installation required a dedicated cold-water line, a drain connection, and under-sink space for the RO tank.
The dishwasher is a Bosch 800 series, with a 42 dBA noise rating (whisper-quiet), a third rack for flatware and utensils, and a panel-ready design so we can attach a cabinet panel to match the surrounding cabinetry. It disappears visually while providing German engineering that’ll run 15+ years.
| Appliance/Fixture | Model Selected | Key Features | Expected Lifespan |
|---|---|---|---|
| Kitchen Sink | Kraus KHU100-32 (16-gauge stainless) | Single bowl, sound-dampening, commercial-grade | 25-30 years |
| Main Faucet | Kohler Artifacts K-99259 | Pull-down sprayer, magnetic dock, ceramic disc valves | 20-25 years |
| Filtered Water Tap | Brondell Circle RC100 | Reverse osmosis, 50 GPD, dedicated faucet | 10-12 years (filter replacements) |
| Dishwasher | Bosch SHPM88Z75N (800 series) | 42 dBA, third rack, panel-ready, 16 place settings | 15-18 years |
| Range Hood | Zephyr Titan 36″ (650 CFM) | Stainless steel, baffle filters, 4-speed control | 15-20 years |
| Gas Range | Samsung NX60A6711SS (6.0 cu ft) | 5 burners, convection oven, air fry mode, slide-in design | 12-15 years |
![]()
Electrical Upgrades: Modern Loads Need Modern Infrastructure
The existing electrical panel was a 100-amp service from 1994. Modern kitchens with induction cooktops, convection ovens, and multiple small appliances require a minimum of 200-amp service. We upgraded the entire panel, new 200-amp service entrance, modern circuit breakers, dedicated 20-amp circuits for small appliances, and proper GFCI protection for all counter outlets.
Harris County code requires GFCI protection for all countertop receptacles within 6 feet of a sink. We installed GFCI circuit breakers at the panel instead of GFCI outlets at each location. This provides a cleaner look, easier troubleshooting, and better protection. Each countertop section has at least two dedicated 20-amp circuits, which prevents breaker trips when running multiple appliances.
The island required running new circuits under the slab; we core-drilled through the foundation, ran PVC conduit, and pulled 12/2 Romex for three dedicated outlets and the wine cooler circuit. This is where experience matters. Budget contractors sometimes run surface-mounted conduit or install inadequate circuits that trip constantly.
We also added USB charging outlets at the peninsula, dual USB-A ports integrated into standard duplex outlets. These became the homeowners’ favorite feature because they’re where phones actually get charged during daily kitchen use. Cost: $45 per outlet. Value: convenience every single day.
“Electrical work is where homeowners don’t know what they’re getting until it fails. You can’t see wire gauge. You can’t tell if junction boxes are properly rated. You don’t know if the electrician used aluminum wire in applications that require copper. I’ve been called to fix kitchen remodels where the contractor used 14-gauge wire on 20-amp circuits, that’s a code violation and a fire hazard. Or they installed GFCI outlets downstream from each other, so one trips and kills power to three others. Electrical work needs to meet code minimum as a baseline, then exceed it for reliability. The $2,000 difference between minimum-code electrical and professional-grade work prevents $15,000 in repairs when something burns out or fails inspection during a future sale.”
![]()
Flooring: Dark Wood Planks That Unify the Space
The homeowners selected engineered hardwood in a dark espresso finish, 7-inch-wide planks with a wire-brushed texture and an aluminum oxide finish, rated for heavy traffic and engineered versus solid. In Houston’s humidity, engineered performs better. The plywood core resists expansion and contraction, preventing solid hardwood from cupping and gapping.
We installed using the float method over premium underlayment with a moisture barrier. The existing slab was tested for moisture first. We taped plastic sheets down and checked after 72 hours. No condensation, so we proceeded. If moisture had been present, we would’ve needed a vapor barrier or a different flooring choice. Skipping this test is how contractors end up with cupping floors and angry homeowners.
The installation runs perpendicular to the central sightline from the entry, making the space feel larger. Plank direction matters more than people realize; running parallel to the longest wall expands perceived space by 15-20%. We left proper expansion gaps at all walls (1/2 inch) that are covered by trim, so that seasonal movement won’t cause buckling.
Total flooring: 685 square feet covering both kitchen and living areas in the same material. This creates visual continuity and makes both spaces feel connected. Mixing flooring materials between rooms fragments the space and makes it feel smaller.
| Flooring Phase | Duration | Materials + Labor Cost (685 sq ft) | Critical Steps |
|---|---|---|---|
| Subfloor preparation and leveling | 1 day | $950-$1,485 | Grind high spots, fill low spots, and perform moisture testing |
| Underlayment installation | 4-5 hours | $575-$825 | Premium foam with moisture barrier, taped seams |
| Engineered hardwood installation | 2 days | $6,250-$8,475 | Proper expansion gaps, stagger joints, perpendicular to joists |
| Trim and transition pieces | 1 day | $1,125-$1,650 | Baseboards, quarter-round, doorway transitions |
| Final cleaning and inspection | 3-4 hours | $285-$425 | Remove protective film, clean thoroughly, touch-up as needed |
![]()
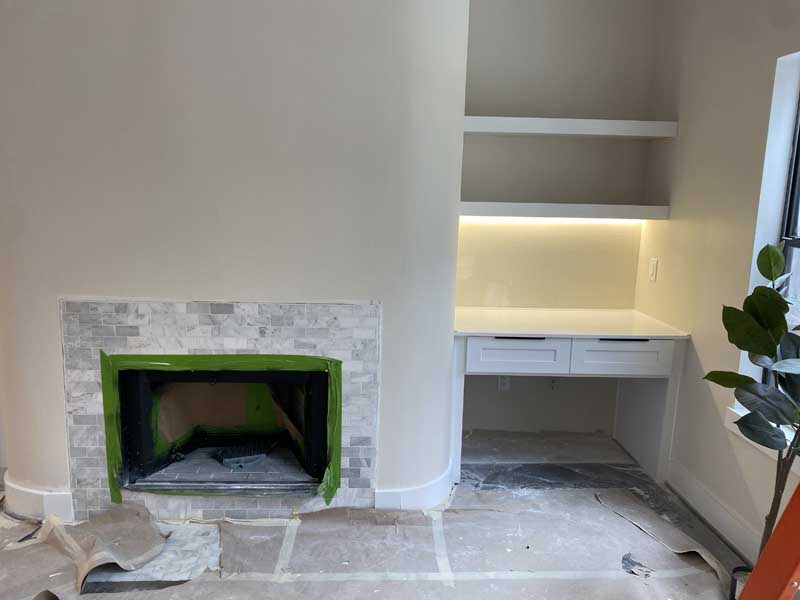
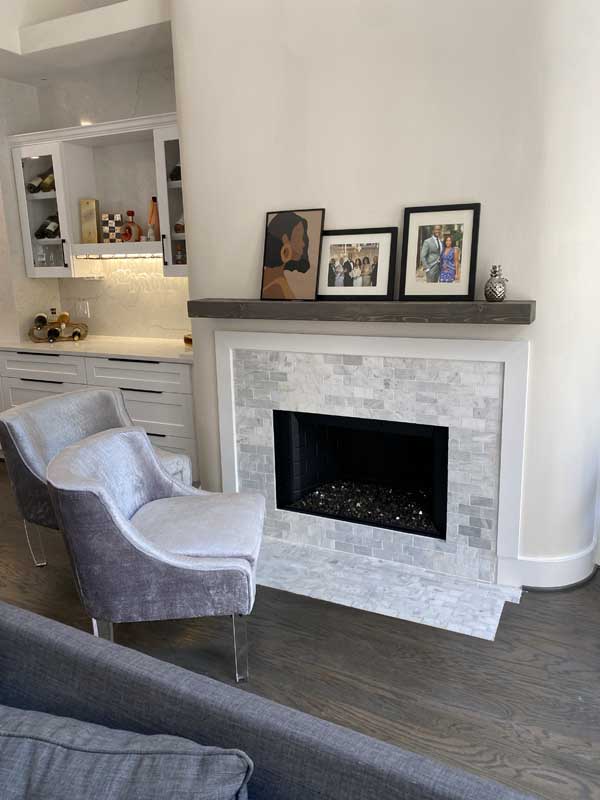
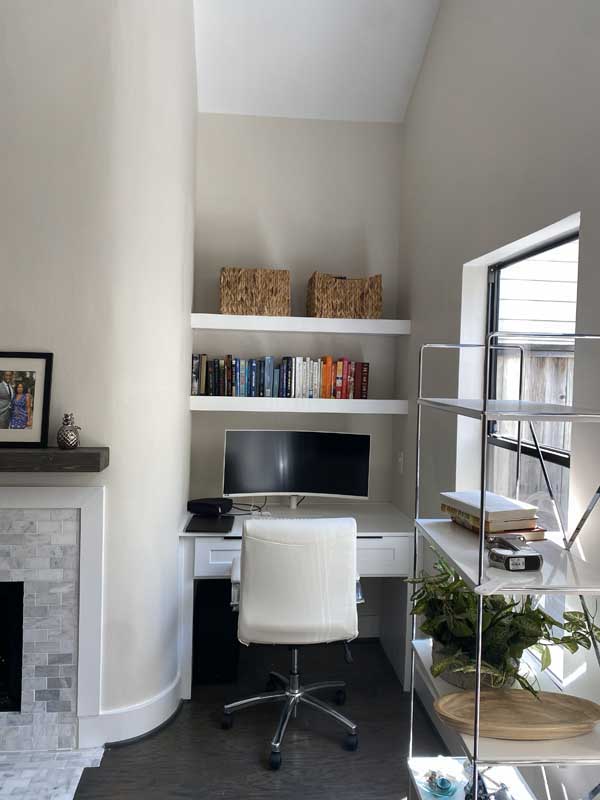
Paint and Finishes: The Details That Elevate Everything
Wall color: Sherwin-Williams Agreeable Gray (SW 7029) throughout the kitchen and living area. This warm gray complements both white cabinets and dark floors without feeling cold or stark. We used their Duration line, premium paint with built-in primer that covers in one coat and resists scrubbing.
Trim work is semi-gloss white, new baseboards, crown molding, and window casings. We used finger-jointed pine primed and painted on-site. The crown molding is a 3.5-inch profile that adds architectural interest without overwhelming the 9-foot ceilings.
The attention to detail shows in corners, seams, and transitions. Caulking between trim and walls uses paintable, flexible latex caulk. All nail holes were filled, sanded, and touched up. These finishes set professional work apart from rushed contractor work.
![]()
Project Timeline: How We Completed This in 11 Weeks
The industry standard for a kitchen and living room remodel of this scope is 20-24 weeks. We finished in 11 weeks from permit submission to final walkthrough. That’s not cutting corners; it’s systematic project management, experienced crews, and relationships with suppliers that keep materials flowing.
- Week 1-2: Permit processing and design finalization. We submitted to Harris County with complete engineered drawings, electrical plans, and plumbing modifications. Our relationship with the permitting office and complete documentation resulted in approval within 12 business days, compared with the typical 4-6 weeks for incomplete submissions.
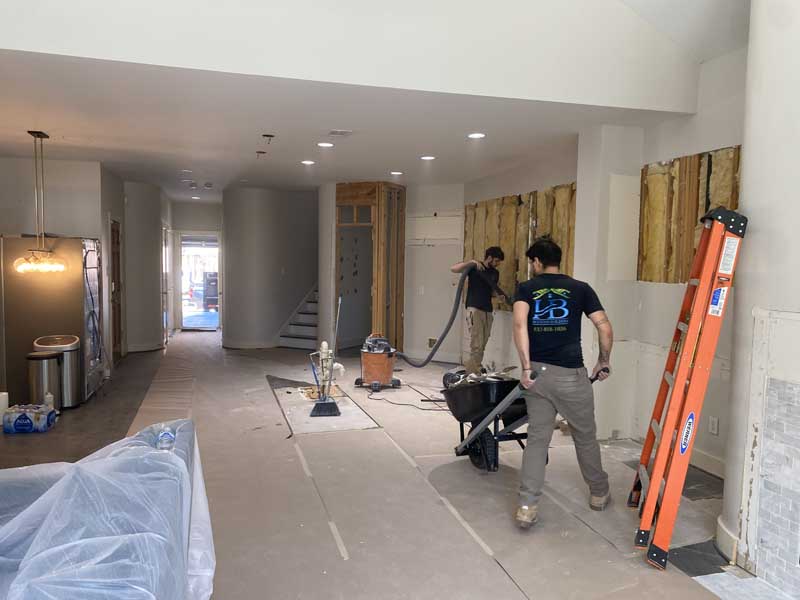
- Week 3: Demolition and structural work. Removed the load-bearing wall, installed the engineered beam, and completed all framing modifications. Debris removal was completed the same day. We don’t leave job sites cluttered.
- Week 4-5: Rough-ins for electrical, plumbing, and HVAC. All new circuits, upgraded panel, plumbing for the island sink, and ductwork modifications for the open floor plan. Inspections passed on the first attempt because our trades know exactly what Harris County inspectors look for.
- Week 6-7: Drywall, mudding, and paint. Three-coat drywall finishing, smooth ceilings, and two coats of premium paint throughout.
- Week 8: Cabinet installation and countertop templating. Cabinets were installed over three days, followed by digital templating for countertops.
- Week 9: Countertop fabrication and installation, backsplash tile work, and flooring installation.
- Week 10: Appliance installation, plumbing fixtures, electrical fixtures, and trim carpentry.
- Week 11: Final touches, punch list completion, and deep cleaning.
| Project Phase | Industry Standard Duration | Our Timeline | Time Savings Method |
|---|---|---|---|
| Permit approval | 4-6 weeks | 12 business days | Complete documentation, established relationships, and engineered drawings |
| Demolition and structural | 2-3 weeks | 1 week | Experienced crew, proper equipment, same-day debris removal |
| Rough-in trades | 3-4 weeks | 2 weeks | Coordinated scheduling, first-try inspection, parework, no rework |
| Drywall and paint | 2-3 weeks | 2 weeks | Professional finishers, premium materials, proper surface prep |
| Cabinetry and counters | 4-5 weeks | 2 weeks | Pre-ordered cabinets, digital templating, and established fabricator relationships |
| Flooring installation | 1-2 weeks | 3 days | Proper subfloor prep, experienced installers, and material on-site before start |
| Final finishes and punch | 2-3 weeks | 1 week | Detailed planning, quality control throughout, rework needed |
The timeline advantage comes from doing things right the first time. When your electrical rough-in passes inspection without corrections, you don’t lose a week waiting for re-inspection. When your cabinet installer arrives, and the walls are perfectly level, installation doesn’t take twice as long due to issues.
![]()
Harris County Permits and Inspections: What Actually Happens
This project required four separate permits through Harris County: building (structural), electrical, plumbing, and mechanical (HVAC). Total permit costs: $2,135. Processing time: 12 business days. As soon as we receive the completed documentation, including engineering drawings.
The building permit covered structural modifications, including removing the load-bearing wall and installing the engineered beam system. The inspector checked beam sizing, joist hangers, temporary supports, and final Load transfer. Pass on first inspection because our engineer’s calculations matched the actual installation.
Electrical inspection covered the panel upgrade, new circuits, GFCI protection, and all receptacle locations. Harris County now requires arc-fault protection on most circuits. We installed AFCI breakers where needed, which adds $45-$65 per circuit and helps prevent electrical fires caused by damaged wire insulation.
Plumbing inspection verified new supply lines, drain connections, gas line modifications for the range, and proper venting. The inspector specifically checked the island sink drain; it needs special venting that many contractors get wrong. We used an air admittance valve (AAV) approved for this application, appropriately sized and accessible for future maintenance.
HVAC inspection confirmed proper duct sizing for the modified floor plan and adequate return air. We added a return air grille in the living room because the original system was undersized for the open-concept layout. This costs an additional $850 but prevents the system from overworking and failing prematurely.
Official resources: Harris County Public Infrastructure Department handles permits for unincorporated areas. Within Houston city limits, contact the Houston Planning and Development Department. Both agencies require similar documentation, but have different Fee structures and inspection protocols.
For contractor licensing verification, check the Texas Department of Licensing and Regulation. Any contractor performing work over $1,000 in Texas must have proper licensing; unlicensed work voids insurance coverage and creates liability issues if problems arise.
| Inspection Type | What Inspectors Check | Common Failure Points | Our Pass Rate |
|---|---|---|---|
| Structural (building permit) | Beam sizing, joist hangers, Load calculations, and temporary supports | Undersized beams, improper joist connections, and missing calculations | 100% first-try pass |
| Electrical rough-in | Wire gauge, circuit protection, box sizing, GFCI/AFCI placement | Wrong wire gauge, missing AFCI, improper box fill, and no grounding | 100% first-try pass |
| Plumbing rough-in | Pipe sizing, slope, venting, gas pressure test, and drain connections | Inadequate slope, missing vents, wrong pipe material, failed pressure test | 100% first-try pass |
| HVAC modifications | Duct sizing, return air, proper connections, and Load calculations | Undersized ducts, inadequate return, improper sealing, and no calculations | 100% first-try pass |
| Final electrical | All devices operational, proper plates, GFCI testing, labeling | Missing plates, non-functional GFCI, unlabeled panel, loose connections | 100% first-try pass |
| Final building | Complete installation, code compliance, safety features, documentation | Incomplete work, missing trim, code violations, and no as-built drawings | 100% first-try pass |
Here’s a video walkthrough of a similar kitchen remodel project we completed, showing the before, during, and after phases:
Total Project Investment and Value Return
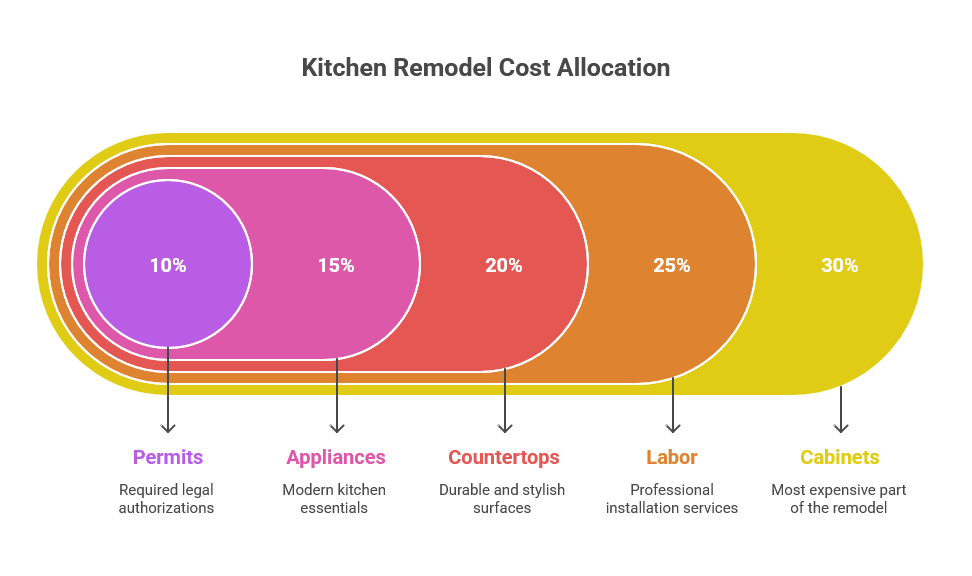
This kitchen and living room remodel came in at $98,500, including all materials, labor, permits, and inspections. That breaks down to $189 per square foot for the 520-square-foot space. For context, kitchen remodeling costs in Houston range from $14 to $275 per square foot, depending on finish quality and scope.
The homeowners initially budgeted $85,000. We had an early conversation on what’s achievable at different price points. The $13,500 increase covered upgrades they deemed worthwhile: engineered quartz countertops instead of laminate ($4,200), custom cabinets instead of stock ($6,500), and premium appliances instead of builder-grade ($2,800).
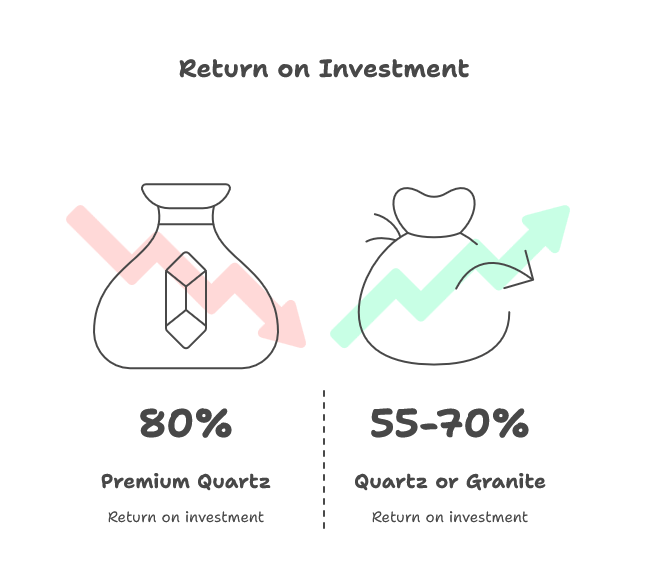
Resale value impact: Kitchen remodels in Houston’s current market return approximately 65-75% of investment at resale. This project adds roughly $64,000 to $74,000 to the home’s value, based on recent comparable sales in the area. But the real return isn’t just financial, it’s an improvement in daily quality of life for a space where the family spends 3-4 hours every day.
Looking at similar budget-friendly remodeling projects we’ve completed, the key to maximizing value is to spend strategically on elements you interact with most (cabinets, countertops, fixtures) while finding cost-effective solutions for elements that have less daily impact.
What Separates Professional Remodeling from Contractor-Grade Work
Homeowners can’t always see the difference between professional work and corner-cutting until problems surface. Here’s what we do differently:
We provide engineered drawings for structural modifications, not sketches on notebook paper. We use licensed, insured subcontractors who carry workers’ comp, not day laborers paid cash. We pull permits for everything that requires them, not just the work visible to inspectors. We install materials in accordance with manufacturer specifications, not “good enough” shortcuts that void warranties.
The cabinets in this project include lifetime warranties on the boxes and frames. That warranty is void if installation doesn’t meet the manufacturer’s requirements, is not level within 1/16 inch, is not fastened correctly at 16-inch intervals, or is not adequately shimmed where needed. Budget contractors skip these steps, leaving homeowners without protection when problems arise.
Our electrical work uses copper wire throughout; some contractors still use aluminum in applications where code technically allows it,t but long-term reliability suffers. We install AFCI protection on circuits beyond minimum code requirements because it helps preventfires, even though it costs more.
The plumbing uses PEX-A tubing with expansion fittings, the most reliable residential plumbing system available. Budget work uses PEX-B with crimp fittings, which have higher failure rates, or cheaper CPVC that becomes brittle over time.
These decisions add 15-20% to project costs versus bottom-dollar contractors. They also prevent the 40-60% additional costs homeowners face when cheap work fails and requires replacement. We’ve built our reputation fixing other contractors’ shortcuts; we’d rather do it right the first time.
Moving Forward With Your Kitchen and Living Room Remodel
This project demonstrates what’s possible when homeowners invest in quality materials, proper planning, and experienced execution. The 11-week timeline shows you don’t need to endure six months of construction chaos to achieve professional results.
For more insights into remodeling projects across the Houston metro area and to discuss your specific renovation needs, contact us for a detailed consultation. We’ll walk your space, discuss your goals, and provide accurate cost projections based on 10+ years of local experience.
Quality kitchen and living room remodels change how you experience your home every single day. When done right, they deliver value that compounds over decades. When done wrong, they create costly problems that must be fixed before you can enjoy the space. The difference is planning, materials, and execution, three areas where experience matters more than homeowners typically realize.