When a growing Houston family needed more room but loved their neighborhood too much to move, they turned to a solution that’s becoming increasingly popular across Texas: building up instead of out. This comprehensive second-story addition project showcases how thoughtful design and expert craftsmanship can dramatically expand a home’s footprint while preserving its character and maintaining its curb appeal.


The Challenge of Growing Families in Established Neighborhoods
Houston’s established neighborhoods offer mature trees, walkable communities, and proximity to quality schools—amenities that are hard to leave behind. Yet many homes in these areas were built decades ago with smaller square footage that doesn’t accommodate modern family needs. A second-story addition provides the perfect compromise, allowing homeowners to expand their living space without sacrificing their location.
This particular project involved adding a complete second floor to an existing single-story home, including new bedrooms, bathrooms, and functional living areas. The transformation required careful planning, structural engineering, and coordination across multiple trades to ensure the latest construction integrated seamlessly with the existing structure.
Project Overview
| Project Component | Details |
|---|---|
| Project Type | Complete second-story addition |
| Location | Houston, Texas |
| Spaces Added | Multiple bedrooms, full bathrooms, covered patio, nursery |
| Architectural Style | Modern coastal contemporary |
| Primary Exterior Colors | Slate blue, charcoal gray, white trim |
| Key Features | Covered outdoor living space, spa-style bathrooms, open-concept rooms |
Design Philosophy: Blending New with Existing
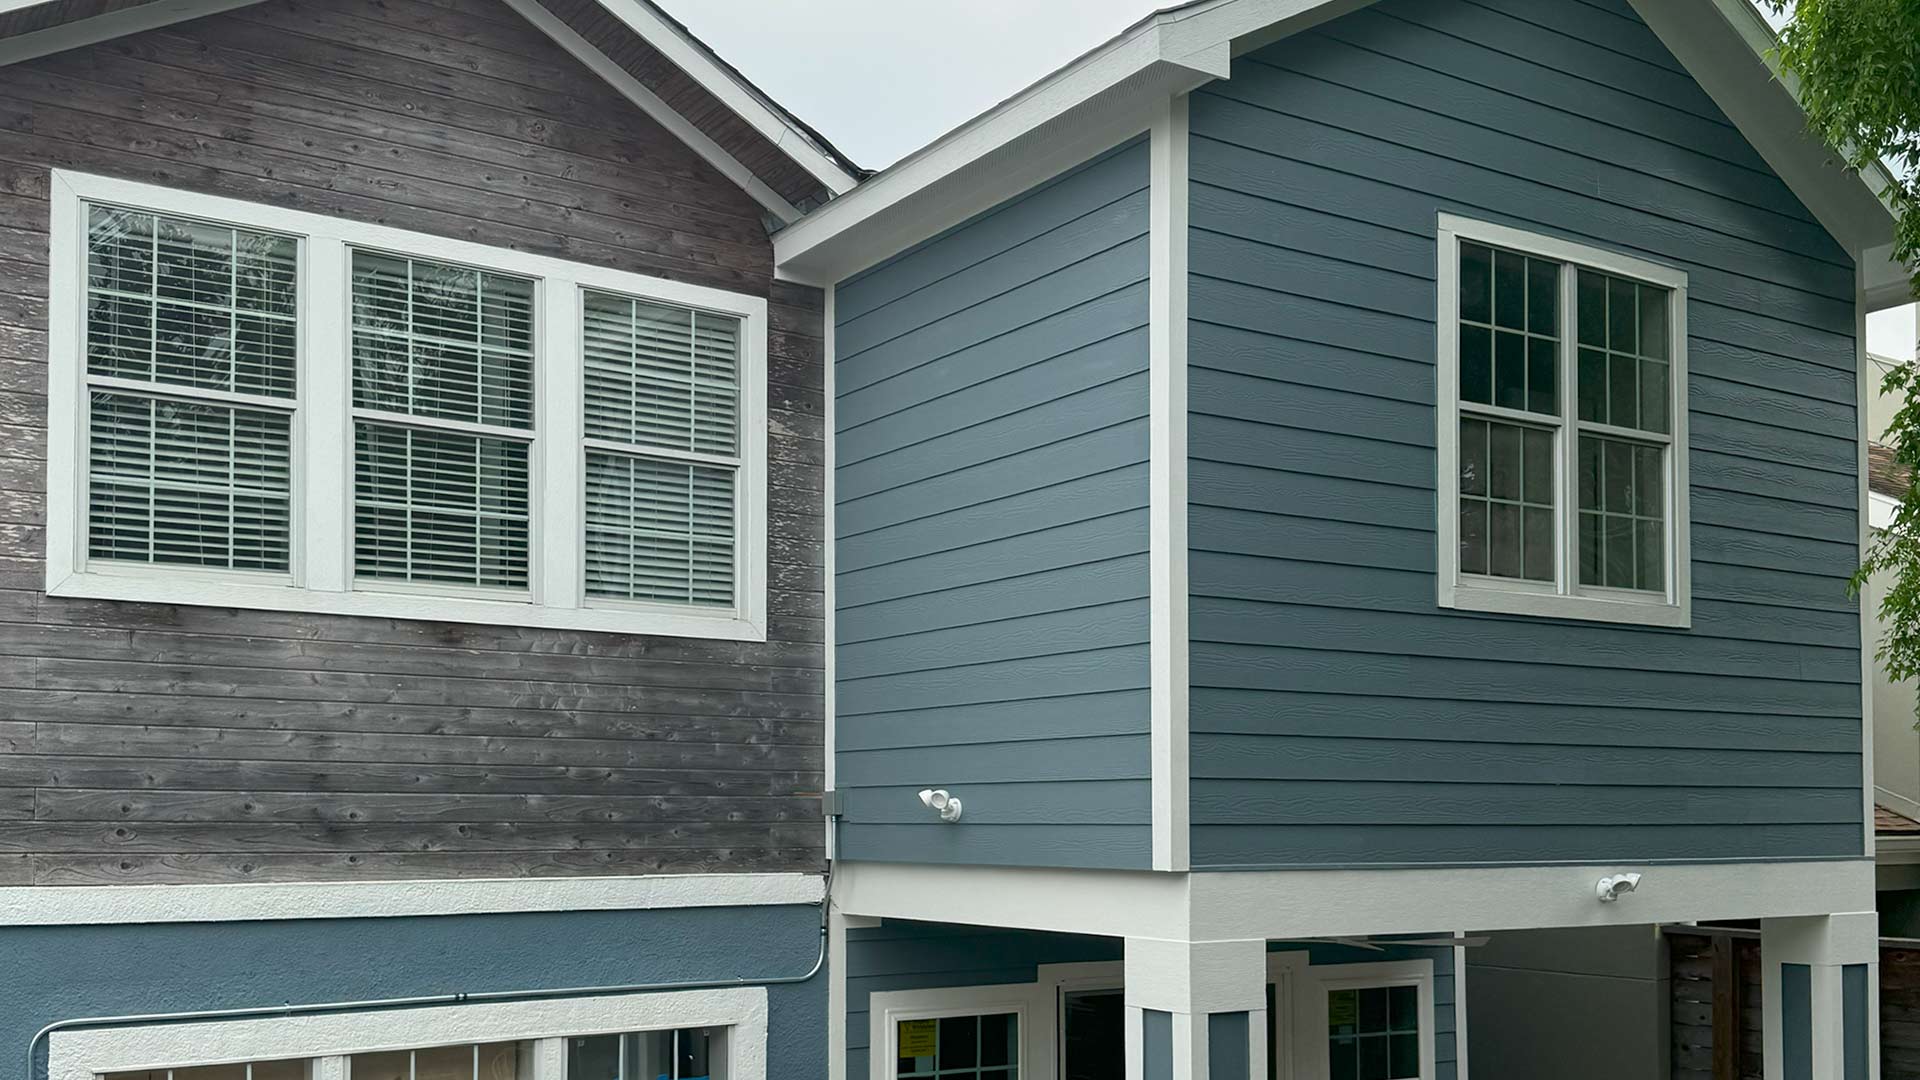
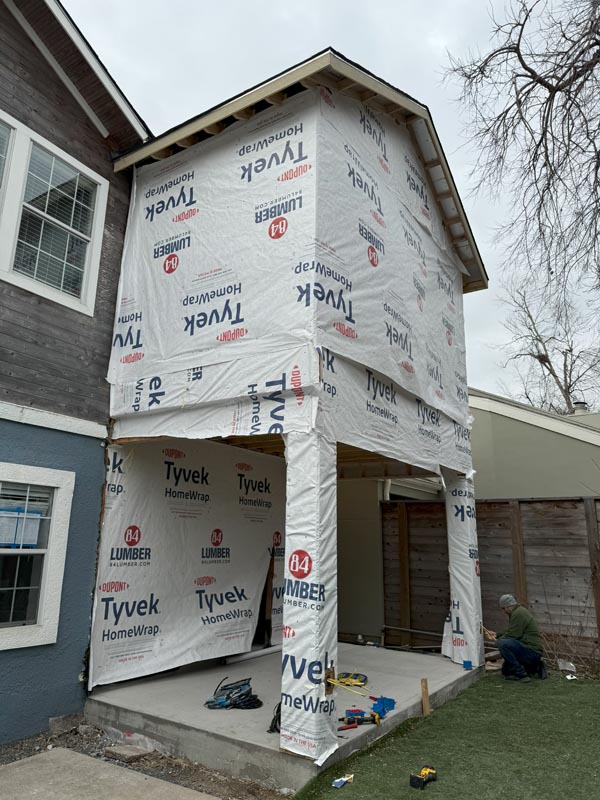
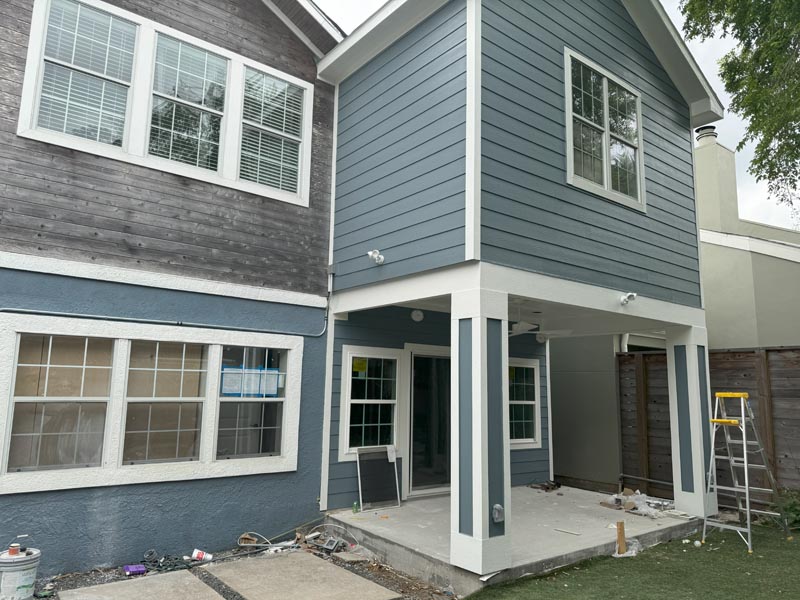
One of the most critical aspects of any second-story addition is ensuring the new construction doesn’t look like an afterthought. This Houston project exemplifies thoughtful architectural integration, with the new second floor complementing the existing home’s style while introducing fresh, contemporary elements.
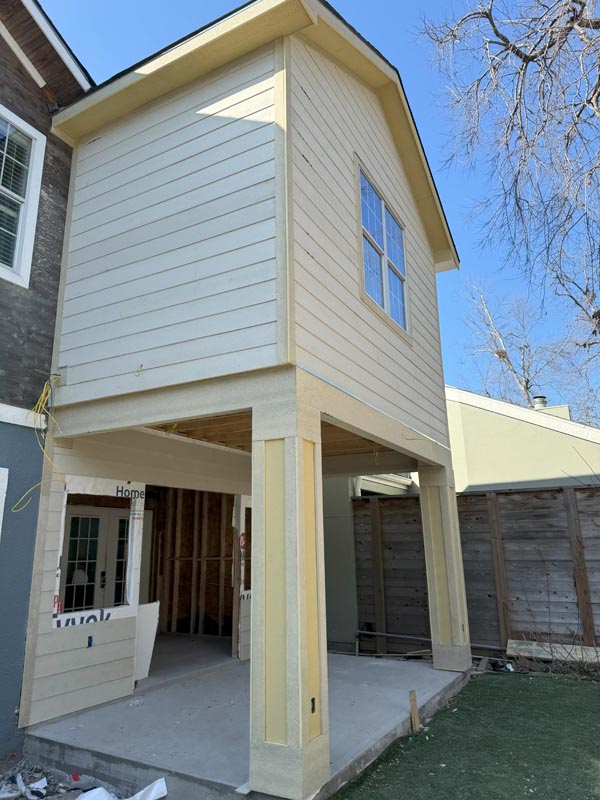
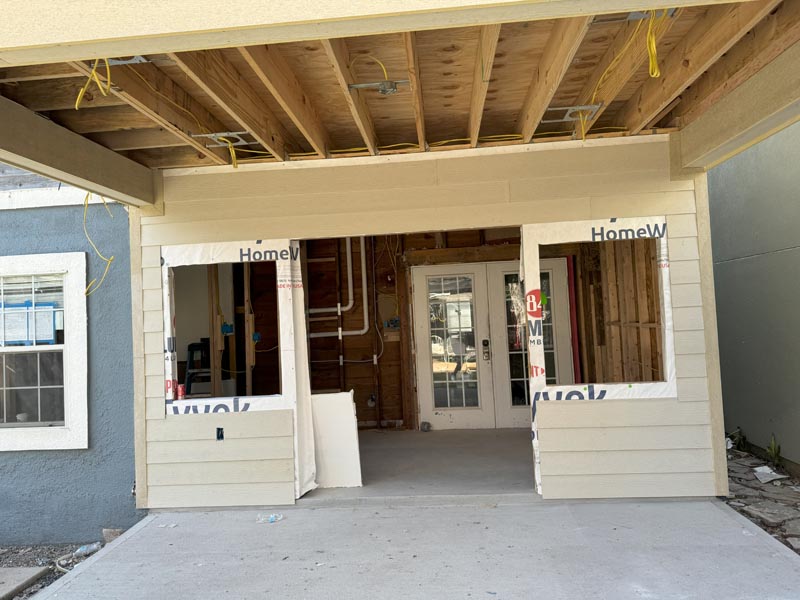
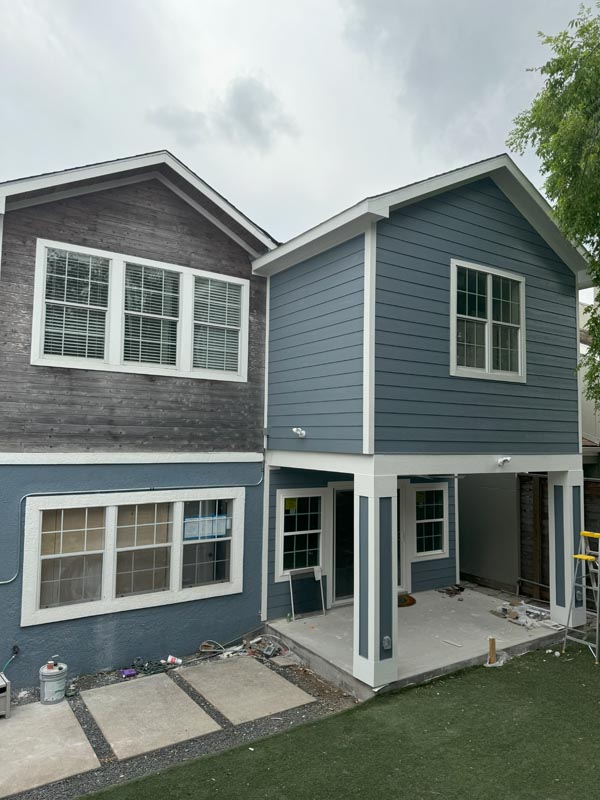
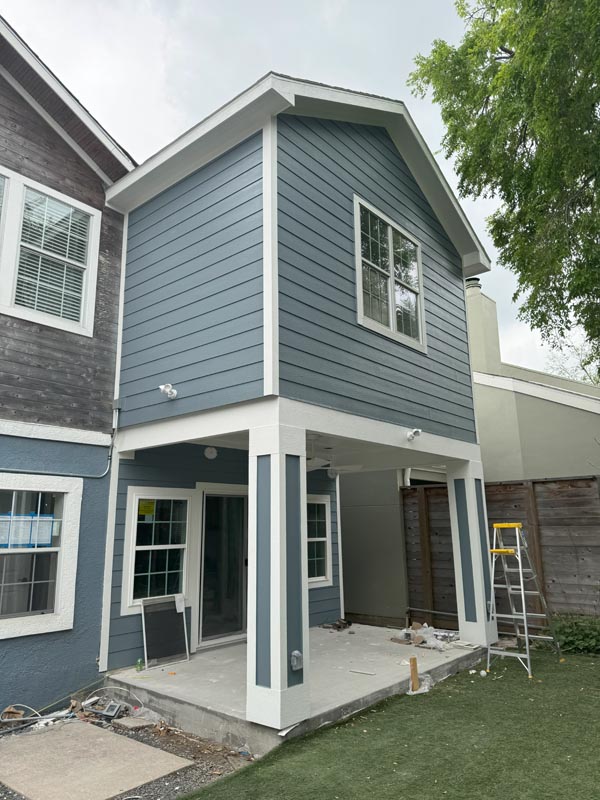
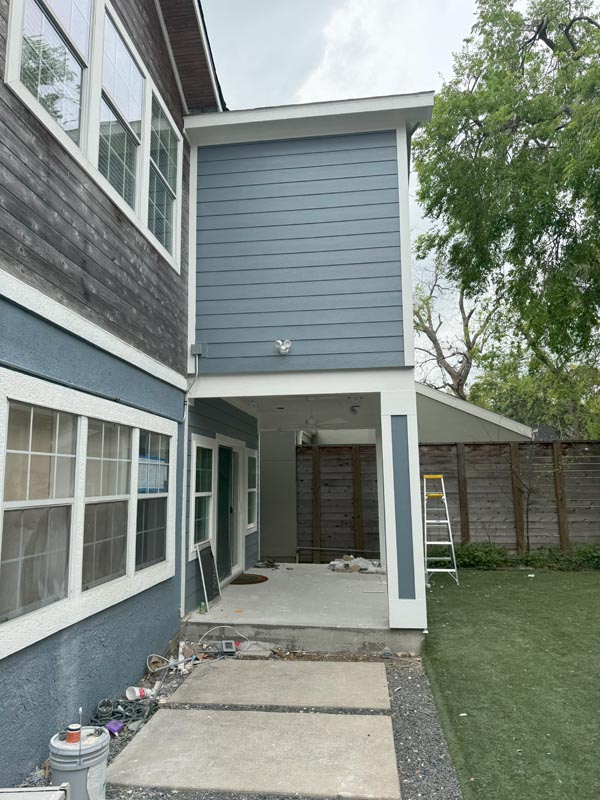
The exterior features a sophisticated color palette combining slate blue and charcoal gray horizontal siding with crisp white trim. This modern coastal aesthetic creates visual interest without overwhelming the original structure. The addition extends over the ground floor, creating a covered patio area that enhances outdoor living space—a valuable feature in Houston’s climate.
“We approach every second-story addition with the mindset that it should look like it was always part of the original home,” says Joe, owner of Houston Builders. “The key is matching architectural details while introducing improvements that elevate the entire property. You want neighbors to say ‘wow, that looks amazing’ rather than ‘you can really tell that’s an addition.'”
Exterior Design Elements
| Feature | Specification | Purpose |
|---|---|---|
| Primary Siding | Horizontal lap siding, slate blue | Modern aesthetic, weather protection |
| Secondary Siding | Horizontal lap siding, charcoal gray | Visual contrast, architectural depth |
| Trim Color | Bright white | Clean definition, traditional accent |
| Roofing Style | Gabled with moderate pitch | Architectural interest, drainage |
| Window Style | White-framed, double-hung | Natural light, ventilation, energy efficiency |
| Covered Patio | An extended overhang from the second story | Outdoor living space, shade protection |
| Weatherproofing | Tyvek HomeWrap system | Moisture barrier, structural protection |
Structural Considerations and Foundation Work
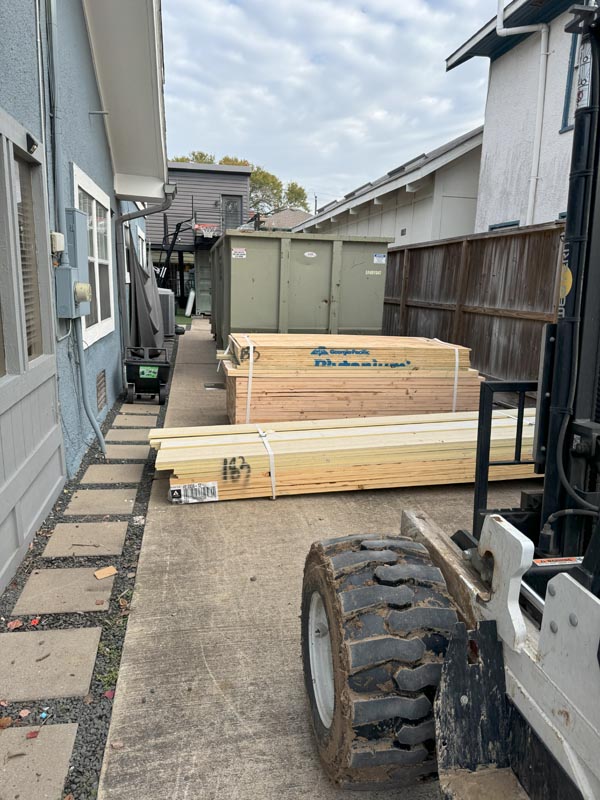
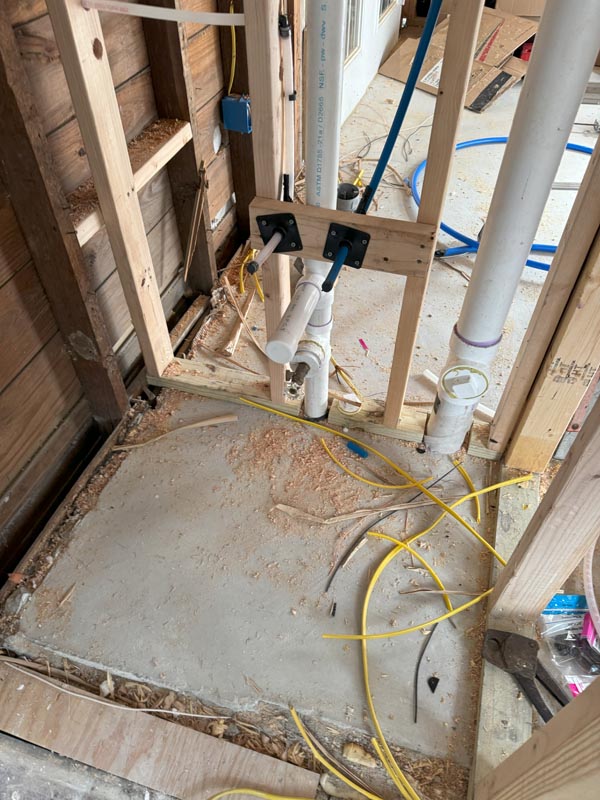
Adding a second story isn’t simply a matter of stacking new rooms on top of existing ones. The project requires comprehensive structural analysis and often foundation reinforcement to support the additional Load. The construction images from this project reveal the extensive groundwork required, including excavated areas showing new plumbing installations and foundation support systems.
The construction team had to carefully assess the existing foundation’s capacity and make necessary upgrades. This included adding reinforced concrete footings and support columns to distribute the weight of the new structure. The exposed plumbing in the excavation photos reveals the complexity of routing new utilities to serve the second-floor bathrooms and living spaces.
Structural Components
| Component | Material/Type | Function |
|---|---|---|
| Foundation Support | Reinforced concrete footings | Load distribution for the second story |
| Floor Joists | 2×8 and 2×10 lumber | Floor structure support |
| Wall Framing | 2×6 studs, 16″ on center | Wall structure and insulation cavity |
| Load-Bearing Walls | Engineered lumber headers | Structural support for the roof and floors |
| Roof Framing | Standard trusses | Roof structure and attic space |
| Subfloor | Plywood sheathing | Floor base and structural rigidity |
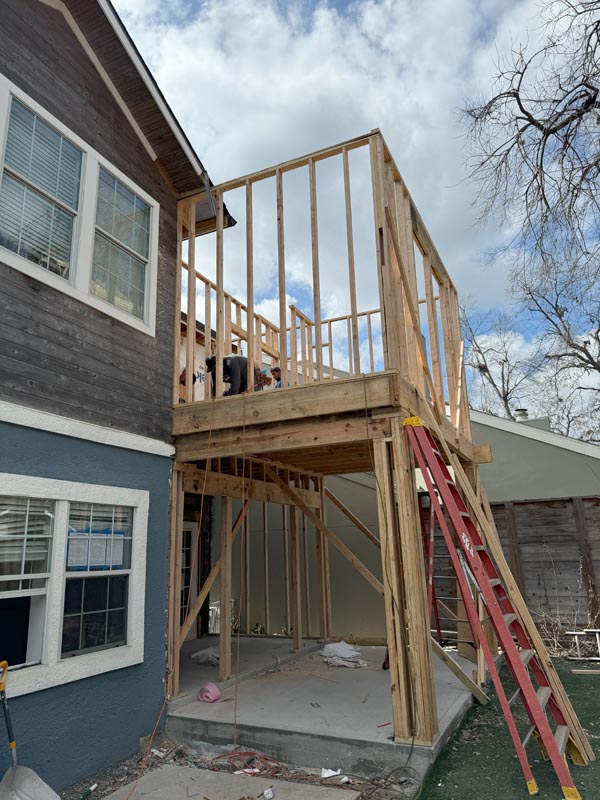
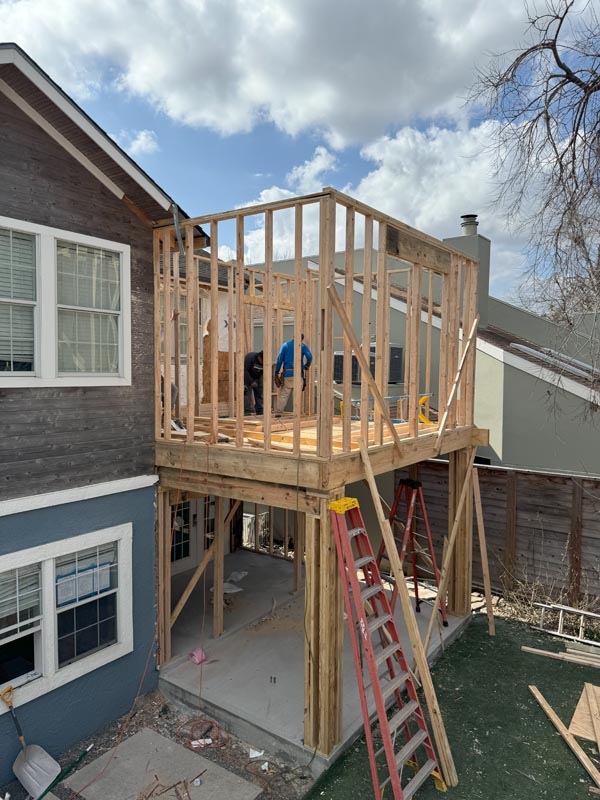
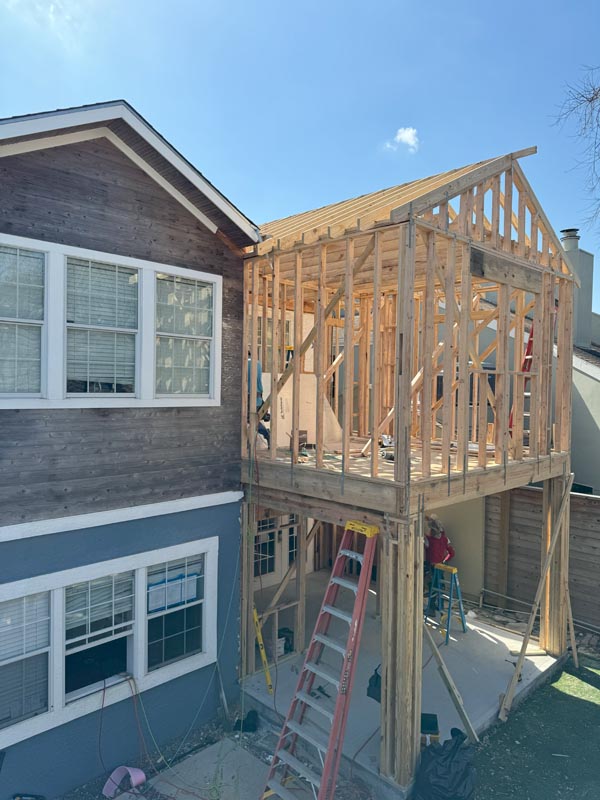
Framing and Construction Process
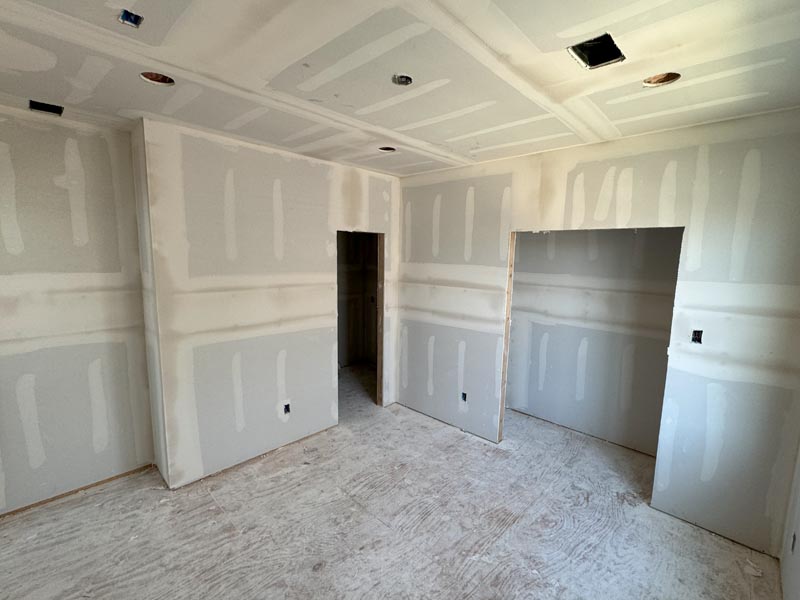
The progression photos document the meticulous framing process that forms the skeleton of the new second story. Standard 2×6 and 2×8 lumber are used to create the wall frames and floor joists, with careful attention to load-bearing walls and proper spacing to ensure structural integrity. The framing stage reveals the bones of what would become bedrooms, bathrooms, and hallways.
House wrap and weatherproofing materials visible in the construction photos demonstrate the importance of protecting the structure from Houston’s humidity and occasional severe weather. Tyvek HomeWrap appears throughout the exterior, providing a critical moisture barrier while allowing the structure to breathe.
“The framing stage is where precision really matters,” Joe explains. “Every measurement needs to be exact because mistakes here compound throughout the rest of the build. We’re creating the foundation for everything that follows—drywall, flooring, fixtures—so getting it right from the start is non-negotiable.”
Construction Phase Timeline
| Phase | Key Activities | Critical Checkpoints |
|---|---|---|
| Planning & Permits | Architectural drawings, engineering calculations, permit applications | Building department approval, HOA review |
| Site Preparation | Foundation assessment, excavation, utility mapping | Structural engineer sign-off |
| Foundation Work | Reinforcement installation, concrete pouring, and curing | Foundation inspection |
| Framing | Wall assembly, floor joists, and roof structure | Framing inspection |
| Weatherproofing | House wrap, window installation, and roofing | Weather-tight milestone |
| Rough-In | Plumbing, electrical, and HVAC installation | Mechanical, electrical, plumbing inspections |
| Insulation | Wall and ceiling insulation | Energy code compliance check |
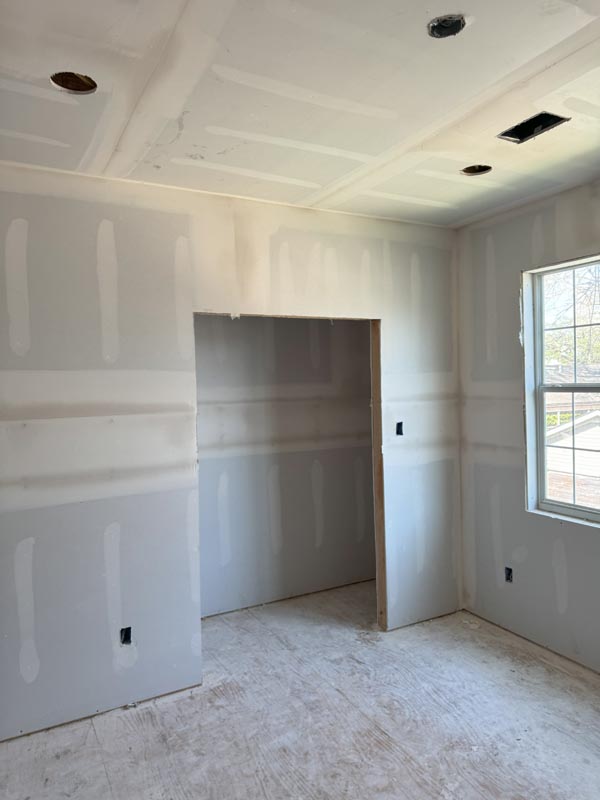
| Drywall | Hanging, taping, mudding, sanding | Interior preparation |
| Interior Finishes | Flooring, tile, paint, trim, fixtures | Quality control checks |
| Final Inspection | Code compliance verification, punch list | Certificate of occupancy |
Before Construction: Understanding the Starting Point
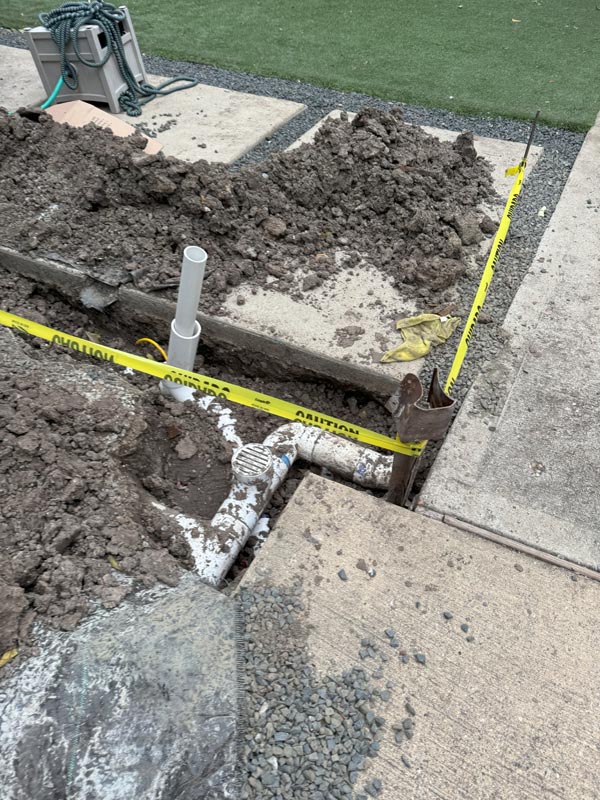
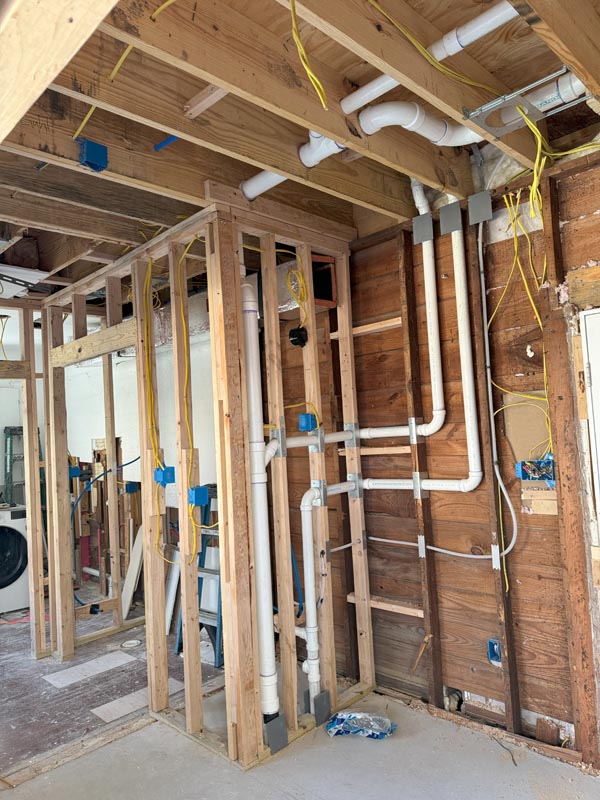
The construction images show the dramatic transformation from bare structure to finished spaces. The framing stage reveals exposed studs, joists, and utilities—the essential infrastructure that supports the beautiful finished product. One particularly revealing photo shows the extensive plumbing rough-in with white PVC pipes routing through wall cavities and ceiling spaces, demonstrating the complexity of integrating new bathrooms into the existing home’s utility system.
The excavation work visible in the construction photos shows the foundation improvements necessary to support the additional weight. Exposed plumbing lines, caution tape marking work zones, and piles of excavated soil illustrate the significant groundwork required before vertical construction could begin.
Before and After Comparison: Major Transformations
| Space | Before Construction | After Completion |
|---|---|---|
| Exterior Addition | Bare wood framing, Tyvek wrap, no siding | Completed slate blue and gray siding, white trim, covered patio |
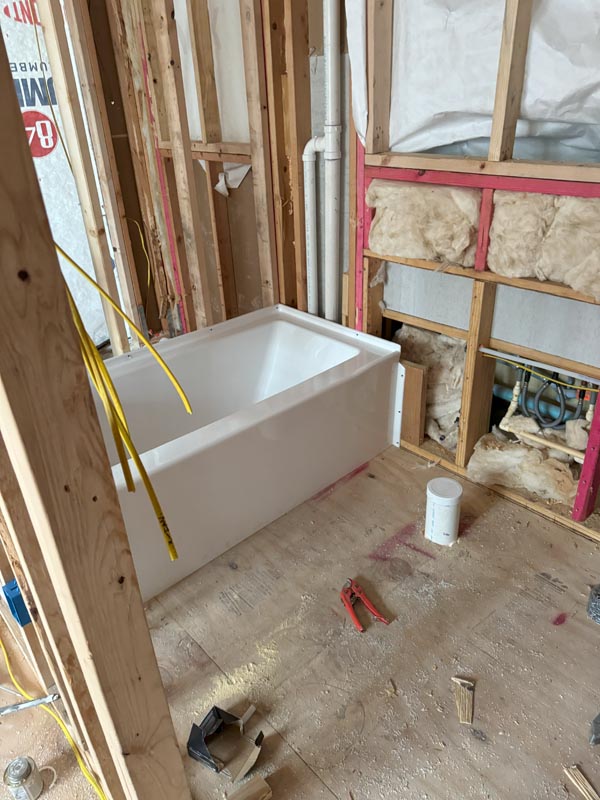
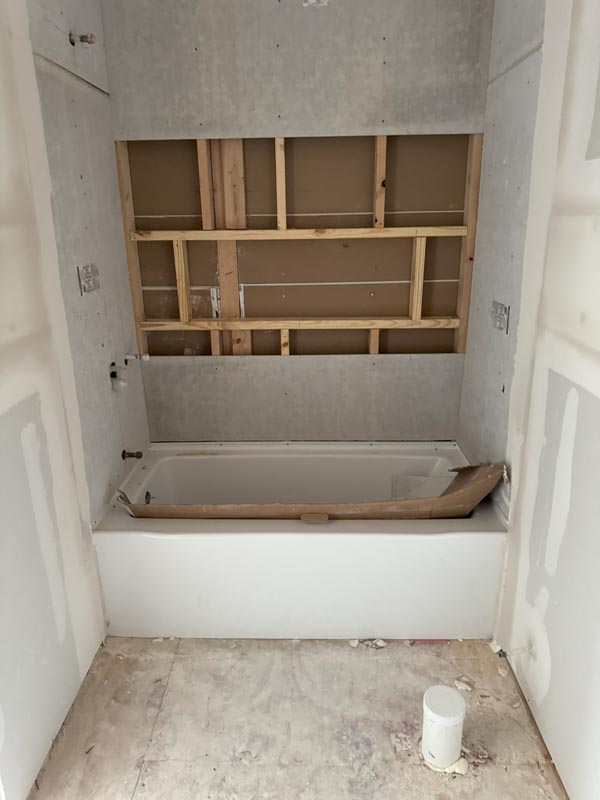
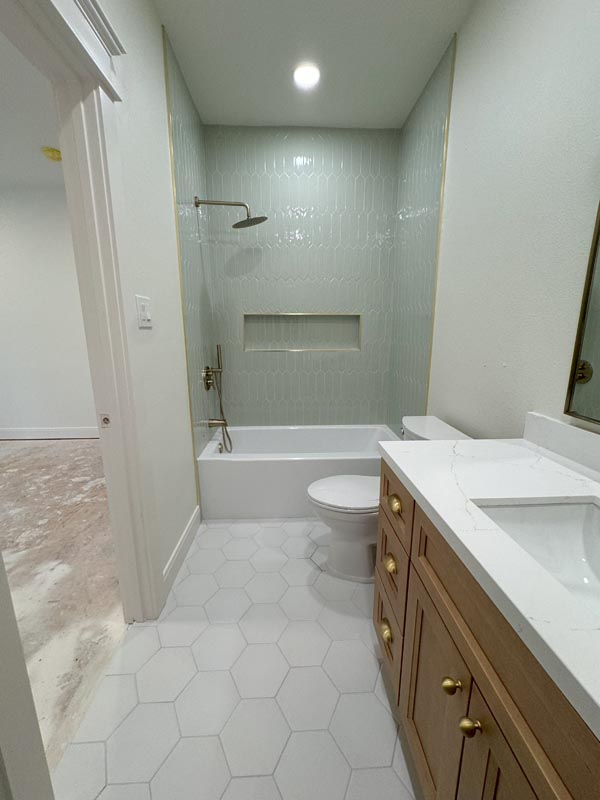
| Primary Bathroom | Exposed studs, red waterproofing, rough plumbing | Elongated hexagon tile, brushed gold fixtures, spa aesthetic |
| Second Bathroom | Bare framing with rough-in plumbing visible | Wood vanity, quartz countertop, terrazzo flooring, gold accents |
| Covered Patio | Open framing under the second-story structure | Finished the ceiling with teal paint, furnished the outdoor room |
| Interior Living Space | Open framing, exposed ceiling joists | Sliding glass doors, finished flooring, and painted walls |
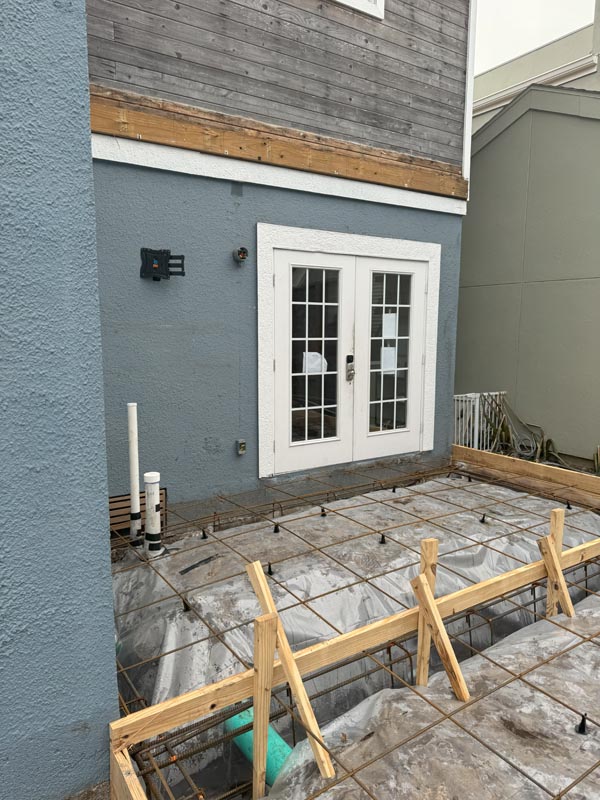
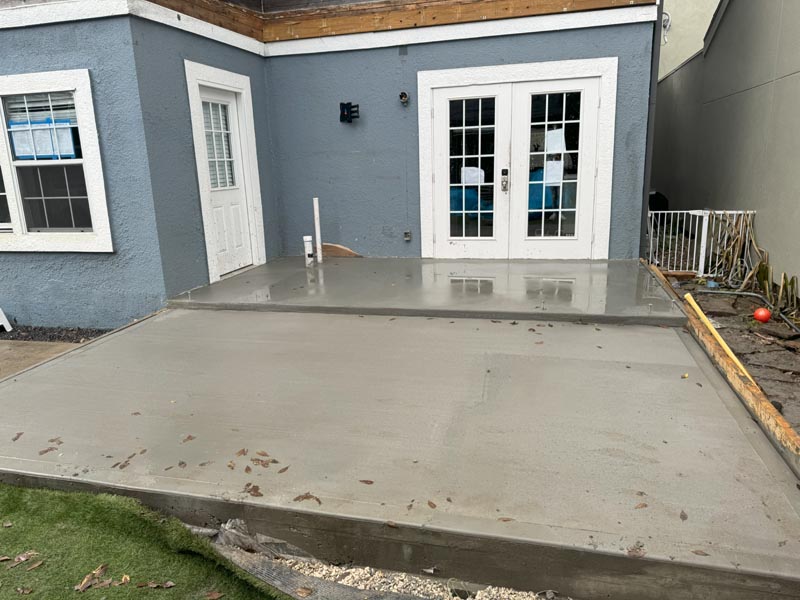
| Foundation Area | Excavated soil, exposed plumbing connections | Completed concrete pad supporting structure |
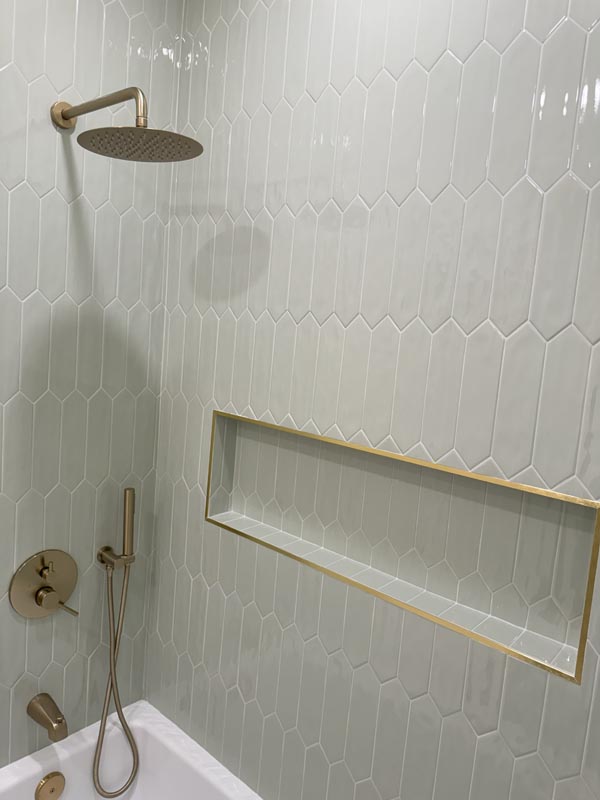
Interior Finishes: Bathroom Elegance
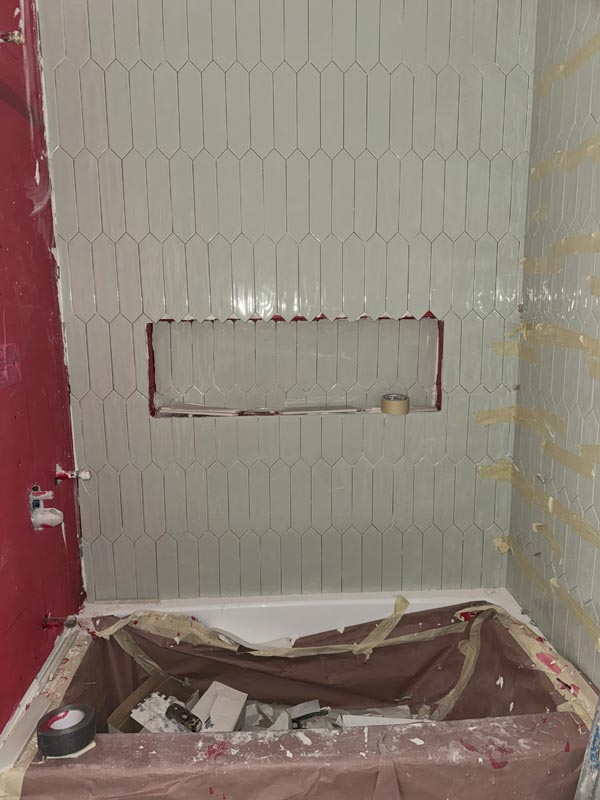
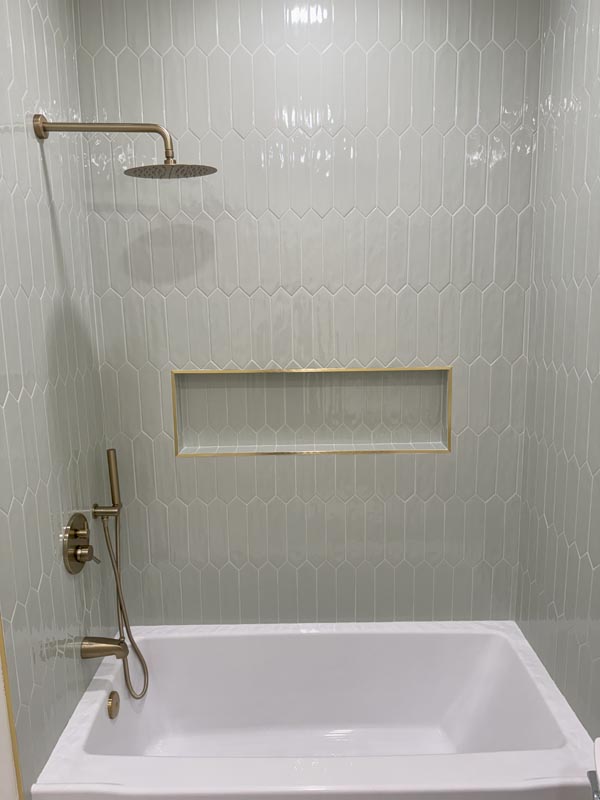
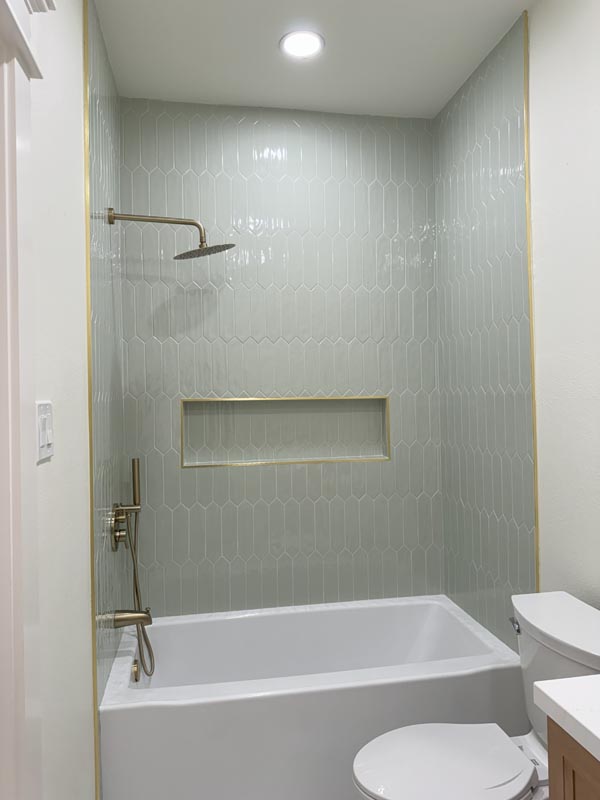
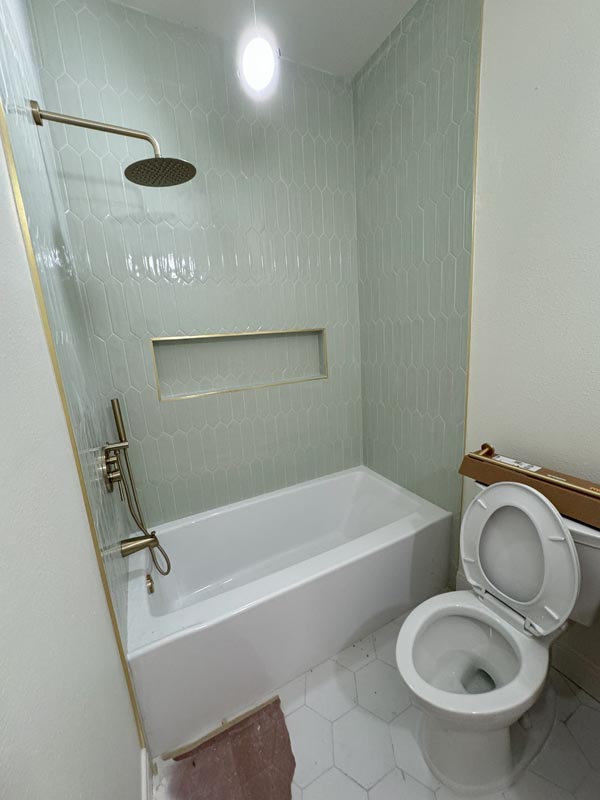
The completed bathrooms showcase how attention to detail transforms functional spaces into spa-like retreats. One bathroom features elegant, picket-patterned white tiles with a subtle, elongated hexagonal shape that creates texture without overwhelming the space. The glossy finish reflects light beautifully, making the room feel larger and brighter.
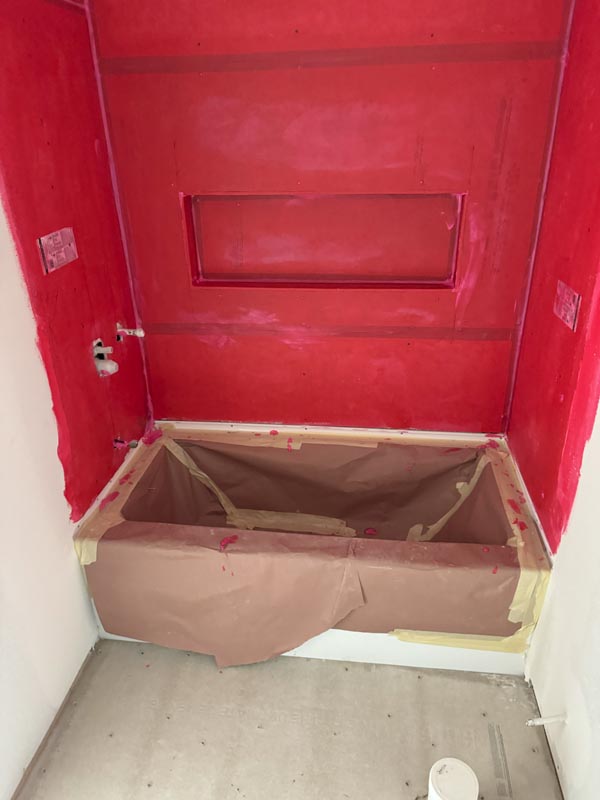
The before photos of this bathroom show the intensive waterproofing stage, with red waterproofing membrane applied throughout the shower area—a critical step in Houston’s humid climate. The rough tile work shows the underlying structure before grouting and finishing brought the design to life.
Brushed gold fixtures throughout provide a warm, contemporary accent against the cool-toned tile. The rainfall showerhead, handheld sprayer, and tub filler all coordinate in this sophisticated metallic finish, creating a cohesive design statement. A recessed niche framed in matching gold trim provides practical storage while serving as a focal point in the shower enclosure.
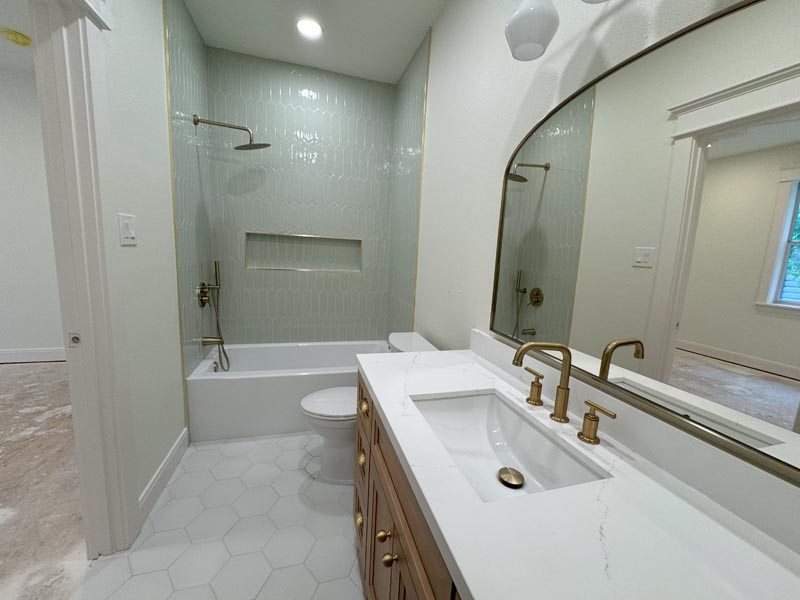
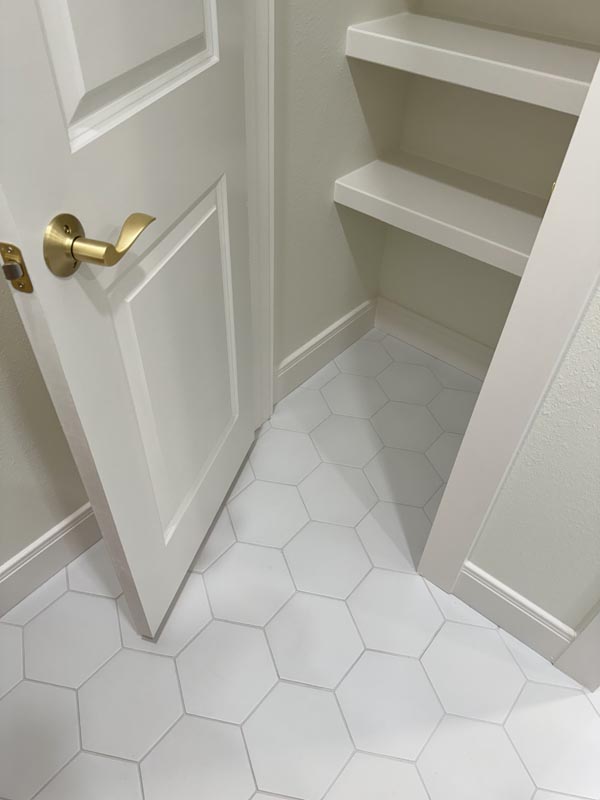
The floor continues the geometric theme with large white hexagonal tiles, a pattern that’s both timeless and on-trend. This choice adds visual interest while maintaining the bathroom’s clean, airy aesthetic.
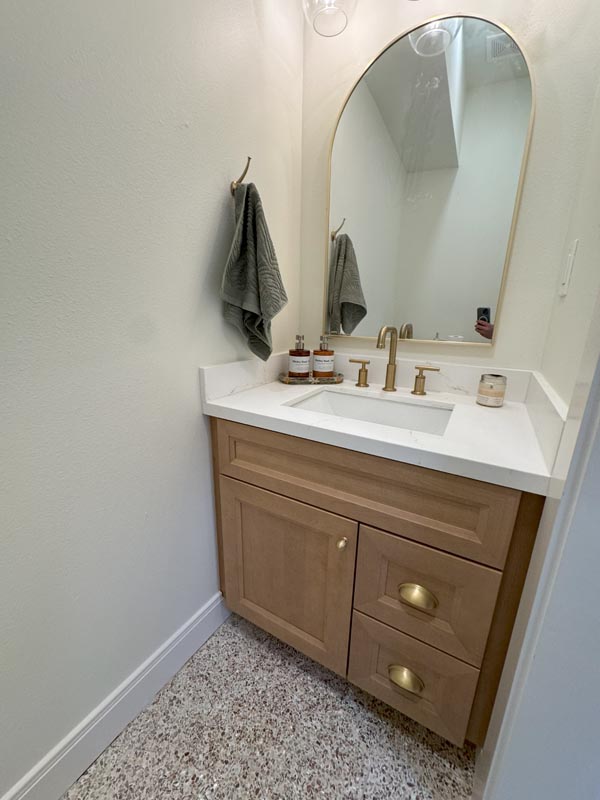
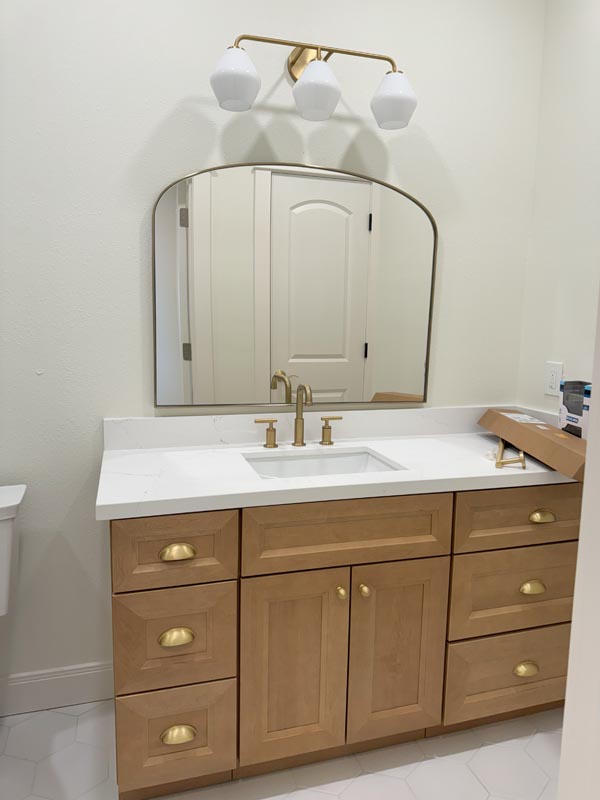
Another bathroom showcases a distinct approach, featuring a wood-grain vanity with brushed gold hardware and a white quartz countertop accented with subtle gray veining. An oval mirror with gold framing ties the color palette together. The terrazzo-style floor adds speckled texture and visual complexity, showing how different materials can coexist harmoniously in a small space.
Bathroom #1 Transformation
| Element | Before | After |
|---|---|---|
| Wall Tile | Red waterproofing membrane over cement board | Elongated hexagon pattern, glossy white tile |
| Floor Tile | Exposed subfloor, rough plumbing | Large white hexagonal tiles, professional grouting |
| Shower Fixtures | Rough copper pipes in the walls | Brushed gold rainfall showerhead and handheld sprayer |
| Tub Area | Protected with cardboard during construction | White soaking tub with gold wall-mounted filler |
| Storage Niche | Framed opening in tile backing | Finished recess with a gold trim frame |
| Overall Aesthetic | Rough construction phase | Spa-like finished bathroom |
Bathroom #2 Specifications
| Element | Material/Finish | Details |
|---|---|---|
| Vanity | Wood grain with shaker-style doors | Natural wood tone, two drawers |
| Countertop | White quartz with gray veining | Durable, low-maintenance surface |
| Hardware | Brushed gold pulls and knobs | Coordinates with the faucet |
| Faucet | Brushed gold, widespread | Three-piece design |
| Mirror | Oval with a gold metal frame | Statement piece |
| Floor Tile | Terrazzo-style, multi-color speckled | Adds texture and visual complexity |
| Lighting | Ceiling-mounted fixture | Provides ambient illumination |
Staircase Design: Connecting Old and New
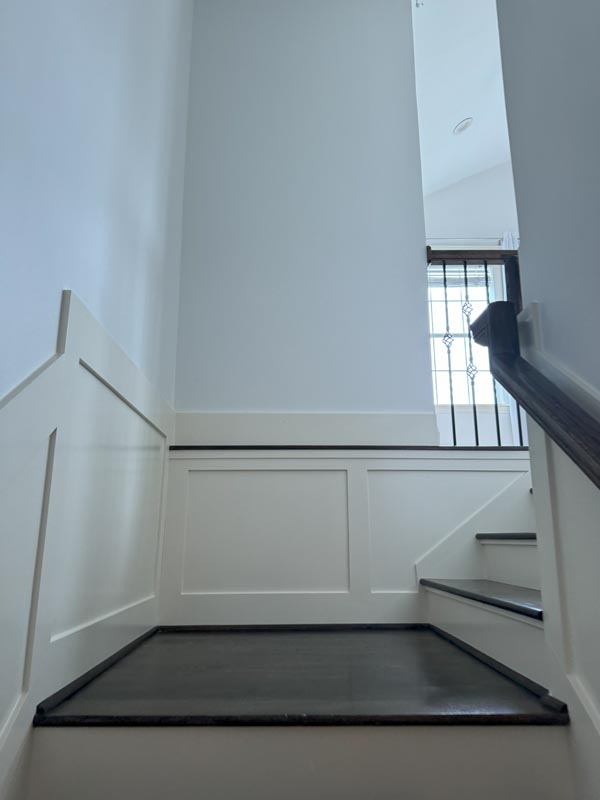
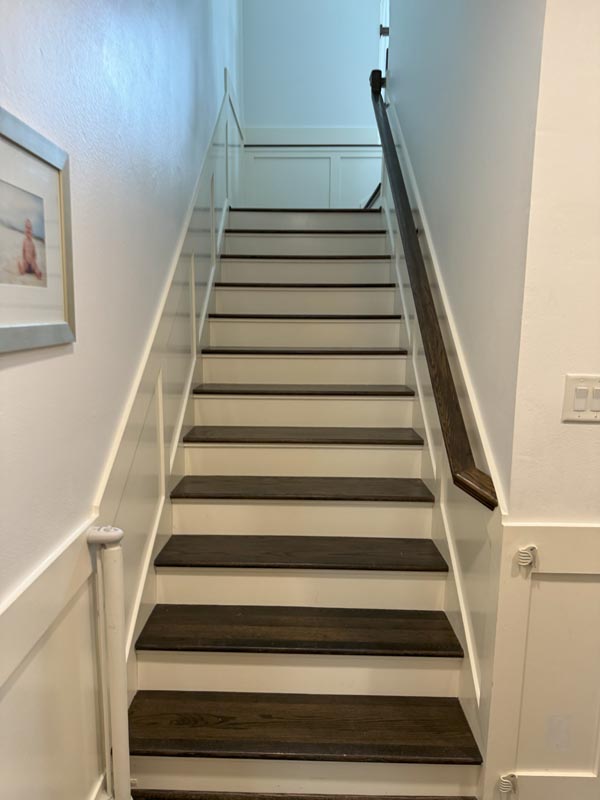
A critical element of any second-story addition is the staircase that connects the two levels. This project features a straight-run staircase with dark-stained wood treads that contrast against white-painted risers. The design creates a classic, clean look that fits the home’s updated aesthetic.
The stairwell itself receives thoughtful treatment with crisp white walls and a modern horizontal handrail system. Proper lighting ensures safe navigation while highlighting the architectural feature. The staircase placement required careful consideration of the existing floor plan to maximize flow and minimize the footprint dedicated to circulation space.
Staircase Features
| Component | Specification | Design Purpose |
|---|---|---|
| Treads | Dark-stained hardwood | Durability, visual contrast |
| Risers | White painted wood | Clean, bright appearance |
| Handrail | Dark-stained horizontal bar | Modern safety feature |
| Balusters | Minimalist vertical posts | Open, contemporary look |
| Wall Treatment | White painted drywall | Light reflection, clean aesthetic |
| Configuration | Straight-run | Space efficiency |
| Width | Standard 36-42 inches | Code compliance, comfortable passage |
Open-Concept Living and Natural Light
The second-floor living area embraces open-concept design principles, with a room featuring sliding glass doors that flood the space with natural light. Flanking windows on either side of the doors maximize transparency, creating a seamless connection between the interior and exterior spaces.
The room opens onto the covered patio below, establishing a visual relationship between the two levels. Light-colored flooring throughout reflects natural light, while simple window trim maintains clean lines consistent with the modern aesthetic. The space demonstrates how thoughtful window placement can make a room feel significantly larger than its actual square footage.
Living Space Features
| Feature | Details | Benefits |
|---|---|---|
| Sliding Glass Doors | Multi-panel, white frame | Natural light, outdoor access |
| Side Windows | Double-hung, white frame | Cross-ventilation, additional light |
| Flooring | Light-colored laminate or engineered wood | Reflects light, easy maintenance |
| Ceiling Height | Standard 8-9 feet | Spacious feel without excess cost |
| Window Trim | Simple profile, white | Clean modern lines |
| Wall Color | Soft neutral beige/cream | Warm, inviting atmosphere |
| View Access | Overlooks the covered patio | Indoor-outdoor connection |
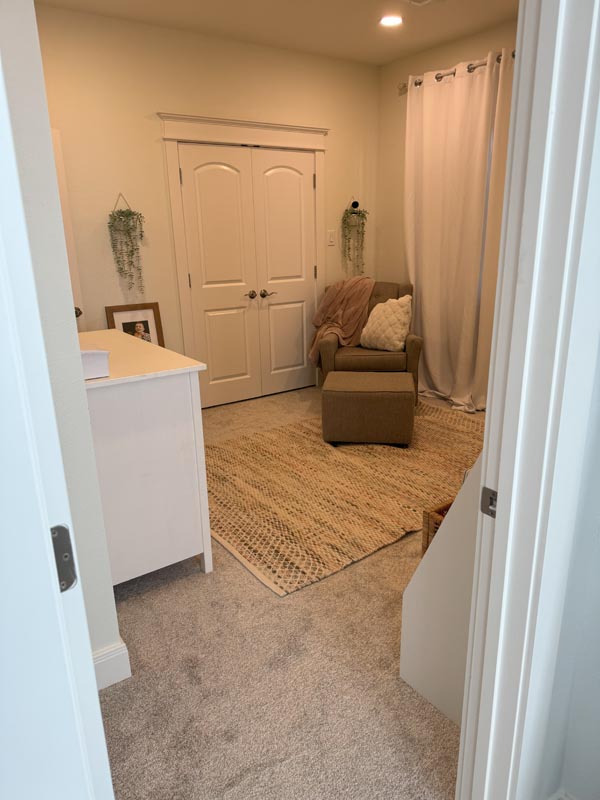
Nursery and Flexible Spaces
One of the completed rooms serves as a nursery, featuring soft neutral tones and practical built-in storage. The double-door closet with arched panels provides ample storage while adding traditional architectural detail. A cozy reading corner with upholstered seating creates a functional space for late-night feedings or storytime.
The room’s layout demonstrates thoughtful space planning, with window placement that provides natural light without compromising furniture arrangement options. The ceiling fan with light fixture addresses Houston’s climate needs while providing ambient illumination.

“When families add a second story, they’re usually planning for growth,” Joe notes. “Nurseries, kids’ rooms, home offices—these spaces need to be flexible enough to evolve as the family’s needs change. Good design anticipates that evolution.”
Nursery Room Specifications
| Element | Details | Functionality |
|---|---|---|
| Wall Color | Soft neutral beige | Calming, gender-neutral |
| Flooring | Carpet in a neutral tone | Soft, sound-dampening |
| Closet | Double doors with arched panels | Ample storage, traditional detail |
| Window | Standard double-hung | Natural light and ventilation |
| Ceiling Fan | With an integrated light fixture | Air circulation, lighting |
| Seating Area | Upholstered chair with ottoman | Feeding and reading space |
| Storage Solutions | Built-in shelving | Organization and display |
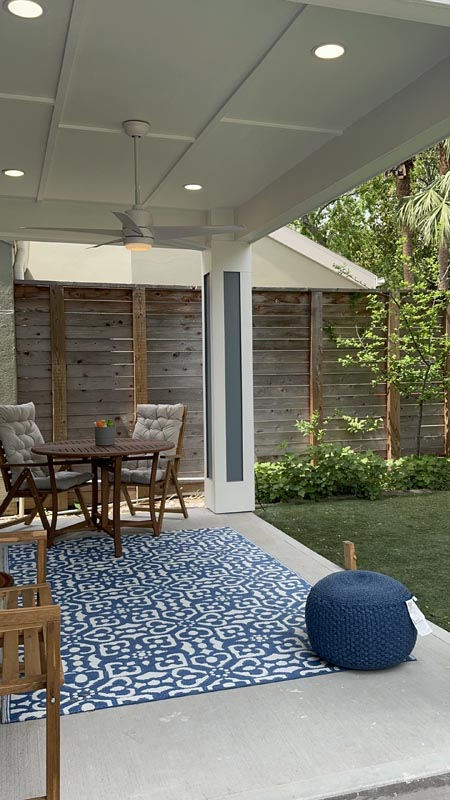
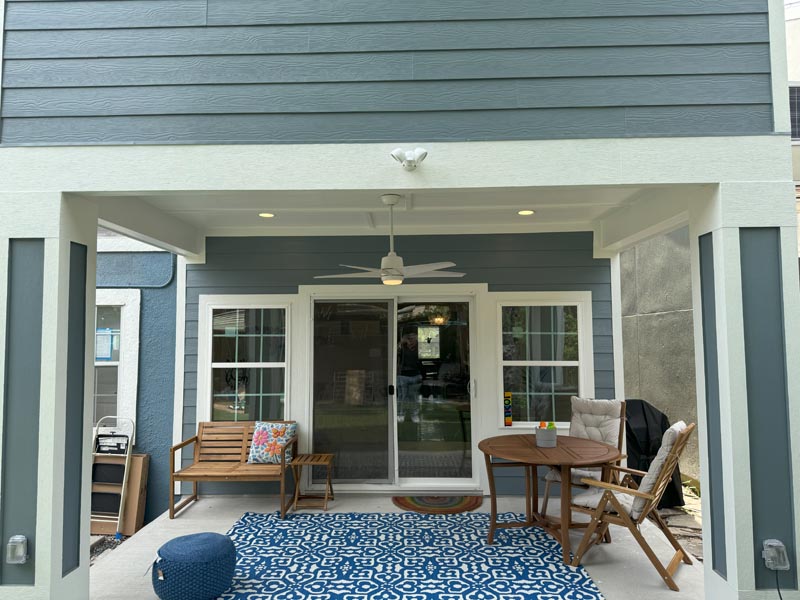
Outdoor Living Integration
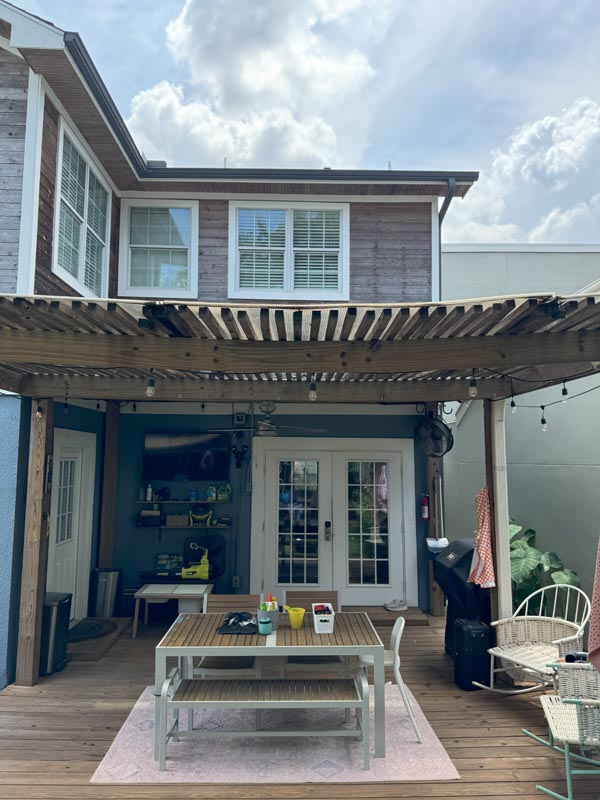
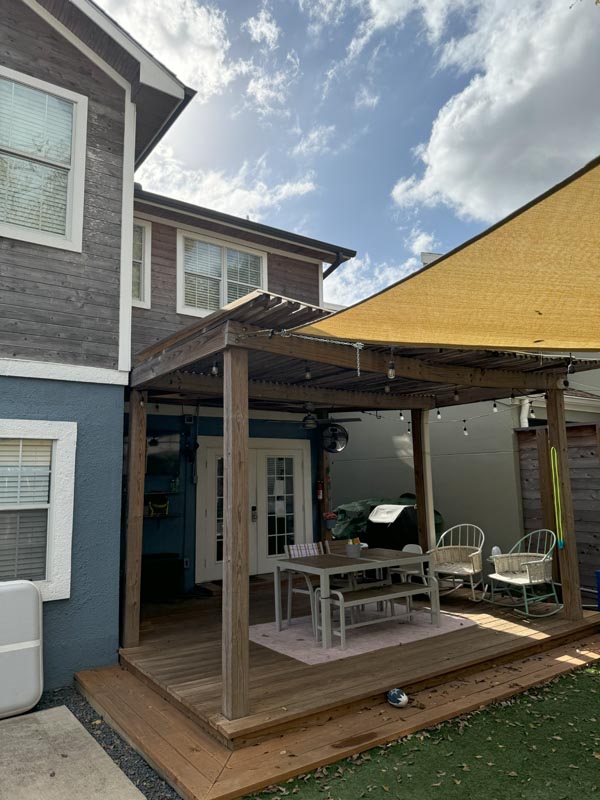
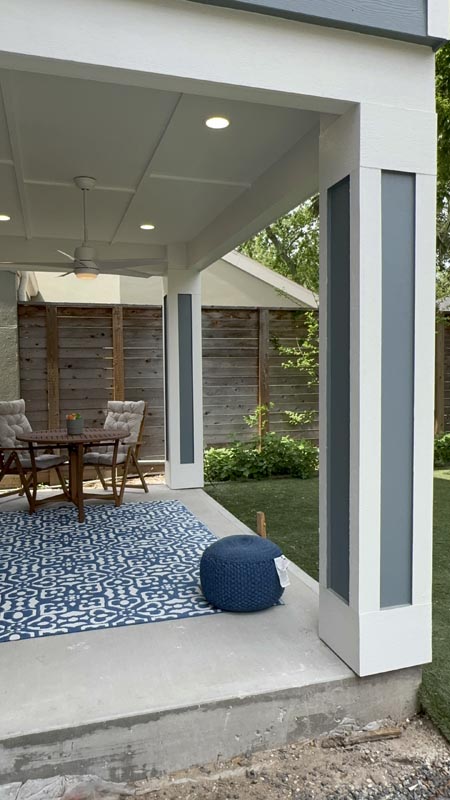
The covered patio created by the second-story overhang serves as a bonus living space, significantly enhancing the home’s functionality. The images depict this area as an outdoor room, furnished with comfortable seating, a ceiling fan, and strategic lighting. The teal-painted ceiling adds a pop of color and creates the illusion of sky, a design trick that makes covered spaces feel more open.
French doors connect the patio to interior spaces, blurring the line between inside and outside. This integration is particularly valuable in Houston, where outdoor living extends nearly year-round. The covered space provides shade during hot summers while protecting furniture and creating a usable area even during brief rain showers.
An adjacent open deck with pergola framing offers additional outdoor living options. The natural wood construction creates a warm contrast against the home’s cool-toned siding, while the pergola structure provides support for shade sails or climbing plants.
Outdoor Living Specifications
| Area | Features | Materials |
|---|---|---|
| Covered Patio | Ceiling fan, recessed lighting, French door access | Concrete slab, teal-painted ceiling |
| Patio Ceiling | Exposed wood beams, painted ceiling panels | Natural wood, teal paint finish |
| Patio Doors | French doors with divided light panels | White painted wood frame |
| Patio Columns | Square posts | White painted wood or composite |
| Open Deck | Pergola structure, wooden decking | Pressure-treated or composite decking |
| Deck Pergola | Open beam structure | Natural stained wood |
| Outdoor Rug | Blue geometric pattern | Weather-resistant fabric |
| Lighting | String lights, ceiling fan light | LED, weather-rated |
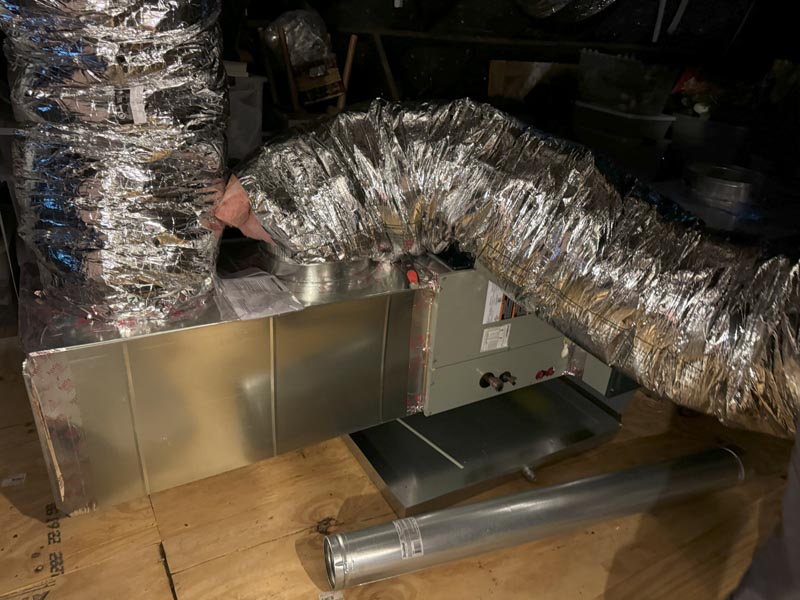
Systems and Infrastructure
Behind the finished surfaces lies a complex network of systems that make the second story functional. Construction photos reveal extensive HVAC ductwork running through ceiling joists, along with PEX plumbing lines that service new bathrooms. Electrical rough-in establishes circuits for lighting, outlets, and dedicated lines for bathroom ventilation.
The images showing rough plumbing installations demonstrate the careful planning required to route water supply and drainage lines from ground-level utilities up to second-floor fixtures. White PVC drain lines and supply pipes create an intricate network within wall cavities and floor structures.
Proper insulation and ventilation ensure the new space remains comfortable, even in Houston’s challenging climate. Energy efficiency considerations likely included upgraded windows, proper air sealing, and adequately sized HVAC equipment to condition the additional square footage.
Mechanical Systems Overview
| System | Components Visible in Construction | Finished Integration |
|---|---|---|
| Plumbing | White PVC drain lines, PEX supply lines, rough-in valves | Concealed within walls, serving bathrooms and fixtures |
| Electrical | Wire runs through studs, outlet boxes, switch boxes | Finished outlets, switches, and lighting fixtures throughout |
| HVAC | Ductwork in ceiling joists, supply and return registers | Climate control for all second-floor spaces |
| Insulation | Fiberglass batts in wall cavities | Energy efficiency, sound dampening |
| Ventilation | Bathroom exhaust fans, soffit vents | Moisture control, air quality |
From Rough to Refined: The Construction Journey
The dramatic transformation from construction site to finished home required months of coordinated work across multiple trades. The progression visible in the images tells a compelling story of craftsmanship and attention to detail.
Construction Progression Highlights
| Stage | Visual Markers in Photos | Completion Milestone |
|---|---|---|
| Foundation | Excavated areas, exposed plumbing, caution tape | Concrete poured and cured |
| Framing | Exposed wood studs, open ceiling joists, Tyvek wrap | Structure weather-tight |
| Rough-In | Visible plumbing lines, electrical boxes, and HVAC ducts | All systems inspected |
| Waterproofing | Red membrane in shower areas, protected tubs | Ready for tile installation |
| Finishes | Installed tile, painted walls, finished floors | Move-in ready |
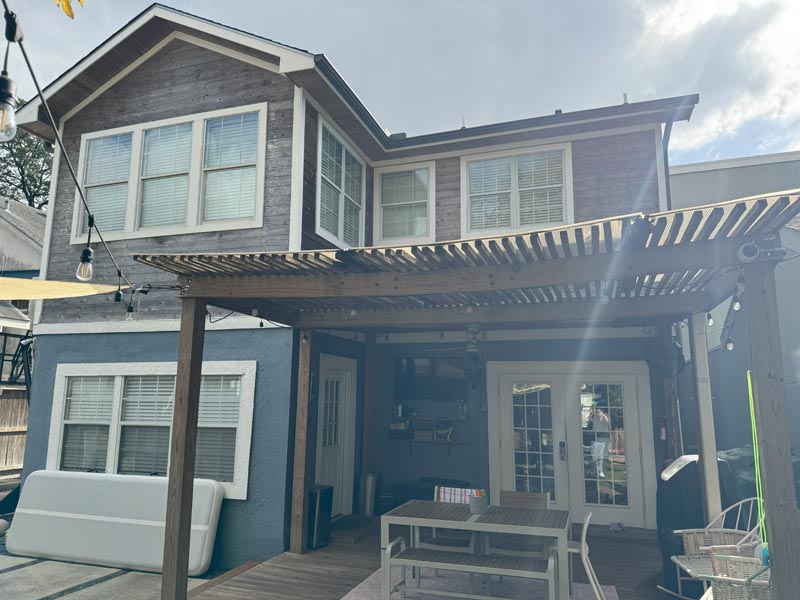
Exterior Transformation
The before-and-after comparison of the exterior showcases perhaps the most dramatic visual transformation. What began as exposed framing wrapped in house wrap evolved into a beautifully finished addition that seamlessly blends with the home.
Exterior Before and After
| Aspect | During Construction | Completed |
|---|---|---|
| Siding | Tyvek HomeWrap, exposed wood framing | Slate blue and gray horizontal siding |
| Trim Work | Raw window and door openings | Finished white trim around all openings |
| Covered Patio | Open framing, exposed ceiling joists | Painted ceiling, finished columns, furnished space |
| Roofing | Plywood decking visible | Complete shingle installation |
| Windows | Protected with tape during construction | Clean, finished white-framed units |
| Overall Appearance | Construction site | Polished, architecturally cohesive addition |
Project Timeline and Coordination
The progression from bare framing to finished living spaces requires coordination among numerous trades. Framers establish the structure, followed by plumbers and electricians who install rough infrastructure. Insulation contractors and HVAC technicians follow, then drywall installers, painters, tile setters, flooring specialists, cabinet makers, and finish carpenters.
Each trade depends on the previous work being completed correctly and on schedule. Weather delays, material availability, and inspection requirements all impact the timeline. A typical second-story addition of this scope generally requires several months from demolition to final walkthrough.
“The timeline is always a balance between speed and quality,” Joe explains. “We could rush through certain phases, but that inevitably leads to problems down the road. Taking the time to do each step right—from foundation work to the final coat of paint—ensures the homeowner gets a space they’ll love for decades.”
Value and Return on Investment
While this article doesn’t focus on specific costs, second-story additions generally represent a significant investment in a home. The value proposition includes not only the additional square footage but also the ability to remain in a desired location, avoid the stress and expense of moving, and customize the new space exactly to the family’s specifications.
The quality of finishes evident in this project—from the tile selections to the fixture choices and attention to architectural detail—suggests an investment in long-term value rather than budget-focused shortcuts. These choices contribute to both daily enjoyment and eventual resale value.
Lessons for Prospective Projects
This Houston second-story addition offers several takeaways for homeowners considering similar projects:
Plan for Integration: The most successful additions appear intentional rather than tacked on. Color coordination, matching trim details, and thoughtful proportions all contribute to cohesive design.
Prioritize Function: Beautiful spaces that don’t meet daily needs represent missed opportunities. This project strikes a balance between aesthetic considerations and practical needs, including storage, natural light, and traffic flow.
Quality Over Shortcuts: The finished bathrooms demonstrate how investing in quality materials and skilled installation creates spaces that feel special rather than merely adequate.
Consider the Whole Property: The covered patio and outdoor spaces show how vertical additions can actually enhance ground-level living, not just add square footage upstairs.
Expect Disruption: Construction photos showing exposed framing and systems remind us that major renovations involve significant temporary disruption. Planning for this reality helps manage expectations.
Key Success Factors
| Factor | How This Project Achieved It |
|---|---|
| Structural Integrity | Comprehensive foundation assessment and reinforcement before vertical construction |
| Weather Protection | Proper house wrap, quality roofing, and window installation |
| System Integration | Careful planning of plumbing, electrical, and HVAC from existing to new spaces |
| Quality Finishes | Premium tile, fixtures, and materials throughout |
| Architectural Cohesion | Coordinated siding colors, trim details, and proportions |
| Functional Design | Thoughtful room layouts, storage solutions, and indoor-outdoor connections |
The Final Result
The completed second-story addition not only increases the home’s square footage but also significantly alters its entire character. The exterior now features a more architectural presence and increased curb appeal, while the interior spaces provide the room a growing family needs. Modern finishes throughout ensure the home feels current rather than dated.
Comparing the construction photos with the finished spaces highlights the expertise required to execute such a transformation. From the careful waterproofing in bathrooms to the precise tile installation, from the structural framing to the finished siding—every phase required skilled craftsmanship and attention to detail.
“There’s something special about handing over keys to a completed addition,” Joe reflects. “Families walk through spaces they’ve only seen on plans, and suddenly it’s real. They can picture their lives unfolding in these rooms. That moment makes all the complexity worthwhile.”
Before and After: The Complete Picture
| Project Element | Starting Point | Final Achievement |
|---|---|---|
| Overall Structure | Single-story home | Two-story home with cohesive design |
| Square Footage | Original footprint only | Doubled living space with a second floor |
| Bathroom Count | Limited bathrooms | Multiple spa-style bathrooms added |
| Outdoor Living | Basic patio | Covered entertainment area plus open deck |
| Architectural Style | Original dated exterior | Updated modern coastal aesthetic |
| Bedroom Count | Original bedroom count | Additional bedrooms, including a nursery |
| Home Value | Pre-addition baseline | Significantly enhanced with quality addition |
Beyond Square Footage
Ultimately, this second-story addition represents more than additional rooms—it’s about enabling a family to thrive in a location they love. Rather than compromise on neighborhood, schools, or commute, they invested in making their existing property work for their evolving needs. The quality execution ensures they’ll enjoy these spaces for years to come, proving that sometimes the best way forward is actually upward.
The project demonstrates that, with proper planning, skilled execution, and attention to detail, a second-story addition can seamlessly blend into the original home, introducing contemporary design elements that enhance the entire property. The journey from bare framing to finished elegance showcases the transformation possible when homeowners choose to build up rather than move out.
“Every project teaches us something new,” Joe concludes. “But the fundamentals never change: solid structure, quality materials, skilled installation, and a design that serves the family’s actual needs. Get those right, and you create spaces that truly enhance people’s lives.”